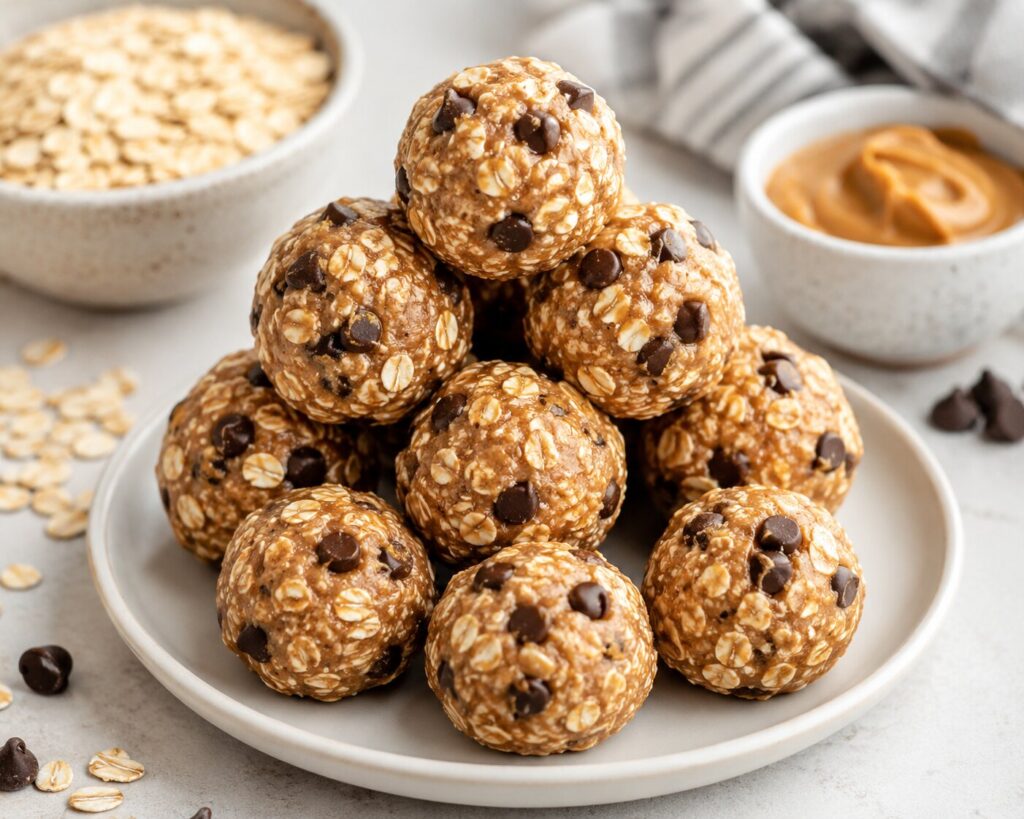
If you’ve ever stood in front of your pantry at 3 PM, starving, staring down a bag of chips versus something that actually fuels your body – you know the struggle. That’s exactly why this protein balls recipe exists.
I’ve been making these for years, ever since I got tired of paying $3 for a single energy ball at a coffee shop that tasted like cardboard with a hint of chocolate. This recipe uses just 5 ingredients, requires zero baking, and comes together in under 15 minutes. No oven, no fancy equipment, no culinary degree required.
Whether you need a pre-workout snack, a post-gym recovery bite, or just something better than a candy bar for your afternoon slump, this recipe delivers. Let’s get into it.
Why This Protein Balls Recipe Works
Most protein ball recipes online overcomplicate things with 10+ ingredients, exotic superfoods, or protein powders that turn chalky and dry. This one doesn’t.
Here’s what makes this version stand out:
- Only 5 core ingredients – no specialty store trips required
- No-bake method – ready in 15 minutes, no oven needed
- Naturally sweetened – no refined sugar required
- Customizable – swap mix-ins based on what you have on hand
- Meal-prep friendly – stays fresh for up to two weeks
- Kid- and gym-bag-approved – sturdy enough to survive a backpack or lunchbox
I’ve tested this formula dozens of times, adjusting ratios until the texture was exactly right: firm enough to hold shape, soft enough to bite into without effort, and never dry or crumbly.
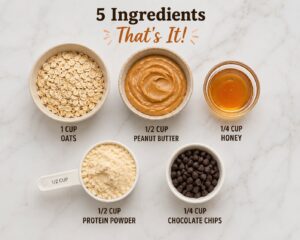
The 5 Ingredients You’ll Need
The beauty of this recipe lies in its simplicity. Here’s exactly what goes into it:
- Rolled oats (1 cup) – the binding base that gives structure and fiber
- Natural peanut butter (1/2 cup) – adds protein, healthy fats, and creaminess
- Honey or maple syrup (1/3 cup) – the natural sweetener that also helps everything stick together
- Protein powder (1/2 cup) – your choice of vanilla or chocolate whey, or a plant-based alternative
- Mini chocolate chips (1/4 cup) – because texture and a little indulgence matter
Pro tip: Use natural peanut butter (just peanuts and salt) rather than the processed kind. Processed peanut butter contains added oils that make the mixture too runny to hold its shape.
Ingredient Substitutions Worth Knowing
Not everyone has the same pantry, dietary needs, or taste preferences. Here are swaps I’ve personally tested and confirmed work well:
- Peanut butter → almond butter, sunflower seed butter (nut-free), or cashew butter
- Honey → maple syrup (vegan-friendly) or agave nectar
- Protein powder → collagen powder, or omit entirely and add 2 extra tablespoons of oats
- Chocolate chips → dried cranberries, chopped nuts, shredded coconut, or chia seeds
- Rolled oats → quick oats (though texture will be slightly less chewy)
Step-by-Step Instructions
This is where the “no-bake” magic happens. There’s no oven, no stovetop, and minimal cleanup. Follow these six steps in order for the best texture:
- Combine the wet ingredients. In a medium mixing bowl, stir together the peanut butter and honey until fully blended and smooth. Microwaving the peanut butter for 15-20 seconds first makes this step even easier.
- Add the dry ingredients. Add the rolled oats and protein powder to the wet mixture. Stir thoroughly until everything is evenly incorporated.
- If the mixture feels too dry, add another teaspoon of honey.
- If it feels too wet, add a tablespoon more oats.
- Fold in the chocolate chips. Gently fold in the mini chocolate chips so they’re distributed evenly without melting from any residual heat.
- Chill the dough. Cover the bowl and refrigerate for 15-20 minutes. This step is often skipped, but it’s essential – chilling firms up the mixture so it’s actually rollable instead of sticking to your palms.
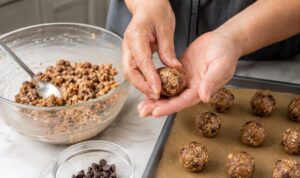
- Roll into balls. Using a small cookie scoop or a tablespoon, portion the mixture and roll each piece between your palms into a 1-inch ball. This recipe typically yields 12-14 protein balls.
- Store and enjoy. Place the finished balls in an airtight container. They’re ready to eat immediately, or chill them for an extra hour for a firmer, fudge-like texture.
Storage and Meal Prep Tips
One of the biggest advantages of this protein balls recipe is how well it holds up over time – perfect for anyone building a weekly meal-prep routine.
- Refrigerator: Store in an airtight container for up to 2 weeks
- Freezer: Freeze in a single layer, then transfer to a freezer bag for up to 3 months
- Room temperature: Safe for up to 2 days, though they soften faster in warm conditions
- Labeling tip: Write the date on the container so you always know freshness at a glance
- Portioning for grab-and-go: Store in individual snack bags of 2 balls each for effortless grab-and-go mornings
Practical tip from experience: I always make a double batch on Sundays and freeze half. Frozen protein balls thaw in about 10 minutes at room temperature – perfect timing for a quick grab-and-go breakfast or gym bag snack.
Nutritional Benefits of Protein Balls
These aren’t just a convenient snack – they’re a legitimately smart nutritional choice when you understand what’s happening at the ingredient level.
- Sustained energy: The combination of complex carbs (oats), healthy fats (peanut butter), and protein creates a slow, steady energy release instead of a sugar spike and crash
- Muscle recovery support: Protein powder contributes to muscle repair, making these ideal within 30-60 minutes after a workout
- Fiber content: Oats provide fiber that supports digestion and helps you feel fuller longer
- Portion control: Because they’re pre-portioned, it’s easier to avoid mindless overeating compared to snacking straight from a bag
- Healthy fats: Peanut butter contributes monounsaturated fats that support heart health when eaten in moderation
- Blood sugar stability: The fiber-fat-protein combination slows digestion, helping prevent the crash associated with sugary snacks
A typical protein ball from this recipe contains roughly 90-110 calories and 4-6 grams of protein, depending on the protein powder brand used.
Approximate Nutrition Per Ball (Based on 12 Balls Total)
- Calories: 90-110
- Protein: 4-6 grams
- Carbohydrates: 8-10 grams
- Fiber: 1-2 grams
- Sugar: 4-5 grams (from natural honey)
- Fat: 4-6 grams
Common Mistakes to Avoid
After making these more times than I can count, here are the mistakes that most often trip people up:
- Skipping the chilling step – leads to a sticky mess that won’t hold shape
- Using processed peanut butter – the added oils make the mixture too loose
- Overmixing – can break down the oats and create a mushy texture
- Using too much protein powder – makes the balls dry and chalky; stick to the recommended ratio
- Storing them uncovered – causes them to dry out within a day
- Rolling with dry hands – causes the mixture to crack instead of compress; slightly damp hands work better
- Using old or stale oats – can introduce an off flavor that’s noticeable in a no-bake recipe
Creative Variations to Try
Once you’ve mastered the base recipe, it’s easy to customize it based on your mood or dietary goals:
- Chocolate peanut butter: Add 1 tablespoon of cocoa powder to the base mix
- Coconut almond: Swap peanut butter for almond butter and roll balls in shredded coconut
- Birthday cake: Use vanilla protein powder and fold in rainbow sprinkles
- Matcha energy: Add 1 teaspoon of matcha powder for an antioxidant boost
- Trail mix style: Mix in chopped almonds, dried cranberries, and a pinch of cinnamon
- Pumpkin spice: Add 1/2 teaspoon pumpkin pie spice and swap chocolate chips for chopped pecans
- Espresso boost: Add 1 teaspoon of instant espresso powder for a caffeinated pre-workout version
Who This Recipe Is Perfect For
This recipe was designed with real, busy lives in mind:
- Athletes and gym-goers needing a quick pre- or post-workout snack
- Busy parents looking for a healthier lunchbox addition
- Office workers who need an afternoon energy boost without a vending machine trip
- Anyone reducing refined sugar but still craving something sweet
- Meal preppers who want grab-and-go snacks ready for the week
- Students who need brain fuel during long study sessions without a sugar crash
Frequently Asked Questions
How long do protein balls last in the fridge?
Protein balls last up to 2 weeks when stored in an airtight container in the refrigerator.
Can I make protein balls without protein powder?
Yes. Simply omit the protein powder and add 2 extra tablespoons of rolled oats to maintain the right texture.
Are protein balls good for weight loss?
Protein balls can support weight loss goals because they’re portion-controlled, high in protein and fiber, and help curb cravings for less nutritious snacks.
Why are my protein balls too sticky?
Sticky protein balls usually mean the mixture wasn’t chilled long enough before rolling, or too much honey was used relative to the dry ingredients.
Can I freeze protein balls?
Yes, protein balls freeze well for up to 3 months. Freeze them in a single layer first, then transfer to a freezer-safe bag.
What protein powder works best for protein balls?
Whey or plant-based vanilla protein powder works best because it blends smoothly without altering the flavor too much.
How many protein balls should I eat per serving?
A typical serving size is 2 protein balls, providing roughly 180-220 calories and 8-12 grams of protein.
Can kids eat protein balls?
Yes, protein balls are generally kid-friendly since they’re made from simple, whole-food ingredients, though parents should check protein powder labels for age-appropriate ingredients.