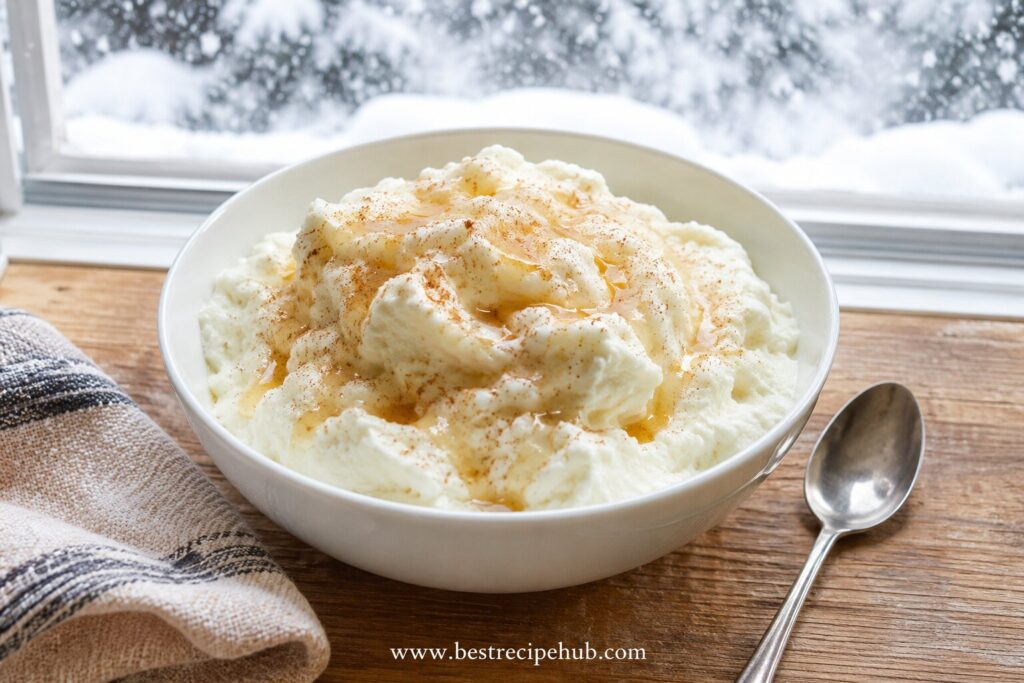
The first snowfall of the season turns ordinary kitchens into ice-cream parlors. Kids press their faces against the windows, parents dig out the winter gear, and somewhere a mixing bowl waits for the one dessert that exists only for a few precious hours: snow cream.
If you grew up in the American South or Midwest, you probably remember a parent or grandparent rushing outside with a bowl the moment the flakes started sticking. That tradition isn’t just nostalgia—it’s a surprisingly simple bit of food science that gives you a creamy, fluffy frozen treat in under 15 minutes with no ice cream maker, no freezer time, and just three ingredients. You can also read our guide on easy cuban recipes at home.
What Is Snow Cream?
Snow cream is a no-churn, ice-cream-like dessert made by mixing fresh, clean snow with sweetened dairy and vanilla. Unlike traditional ice cream, it requires no cooking, no churning, and no waiting for a base to freeze.
- Regionally beloved – A winter staple across the United States, especially in the Appalachian region, the Midwest, the Great Plains, and parts of the South where snow days are rare events.
- Instant texture – Ready in under 15 minutes from the moment you step outside.
- Zero special equipment – No ice cream maker, no churn, no freezer prep.
- Unique mouthfeel – Fluffy and slightly crunchy in a way no store-bought treat can replicate. Think of it as the frozen cousin of a milkshake.
Why This 3-Ingredient Snow Cream Recipe Works
Many online recipes overcomplicate snow cream with extra add-ins, food coloring, or fussy ratios. After testing this recipe across multiple snowfalls—light powder, wet snow, and everything in between—the three-ingredient version consistently delivers the best texture and flavor balance. You can also read our guide on how to make tea.
Here’s what each ingredient actually does:
- Milk or heavy cream – Provides the fat and body that turn snow from “flavored ice” into something creamy. Whole milk gives a lighter result; heavy cream makes it richer.
- Granulated sugar – Doesn’t just sweeten. It lowers the freezing point of the liquid, giving the final mixture a softer, scoopable consistency instead of a dense ice block.
- Pure vanilla extract – Rounds out the flavor so it tastes like dessert, not like a snowball with milk poured over it.
Three ingredients. Five minutes of active work. No special tools.
Ingredients & Equipment
Tools You’ll Need
- Large mixing bowl for collecting snow (glass or metal holds cold longer than plastic)
- Medium bowl for whisking the wet ingredients
- Whisk or fork
- Large spoon or spatula for gentle folding
- Serving bowls (set them out ahead—snow cream needs to be served immediately)
Ingredients
| Ingredient | Amount | Notes |
|---|---|---|
| Fresh, clean snow | 8 cups, lightly packed | Collect from an elevated, undisturbed surface |
| Whole milk or heavy cream | 1 cup | Heavy cream = richer; whole milk = lighter |
| Granulated sugar | ½ cup | Standard white sugar dissolves best |
| Pure vanilla extract | 1 teaspoon | Imitation vanilla works but real vanilla adds depth |
Note: Most home cooks count sugar and vanilla together as one “flavoring” ingredient, which is why this is called a 3-ingredient recipe alongside the snow and the dairy.
Step-by-Step Instructions
Collect the snow first – Take your bowl outside within the first hour or two of snowfall. Scoop only the top layer of fresh snow. Avoid the bottom inch that touches the ground, and skip any snow that’s been sitting more than a day.
Keep the snow cold – Place the bowl of snow in your freezer while you prep the other ingredients. This stops premature melting and keeps the final texture light and fluffy instead of slushy.
Whisk the wet ingredients – In your medium bowl, combine the milk, sugar, and vanilla. Whisk for 30–45 seconds until the sugar is mostly dissolved.
Fold, don’t pour – Remove the snow from the freezer. Pour about one-third of the milk mixture over the snow, then gently fold with a large spoon. Repeat with the remaining liquid in two more additions.
Check the texture – You’re aiming for soft-serve consistency: fluffy, slightly wet-looking, and holding its shape on a spoon.
- Too wet? Fold in a little more snow.
- Too dry or crumbly? Add another splash of the milk mixture.
Serve immediately – Scoop into bowls and enjoy right away. Snow cream doesn’t store well and starts melting quickly at room temperature.
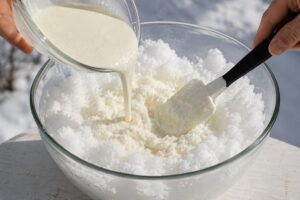
The trick is to add the liquid gradually and fold gently to preserve the airy texture.
Is Snow Cream Safe to Eat?
This is the most common question—and it deserves a straight, science-backed answer.
Freshly fallen snow from a clean area is generally safe to eat in moderation, but with important cautions grounded in atmospheric science:
- Snow forms around microscopic particles in the air. The first few minutes of a snowfall tend to carry more airborne particulate matter because the atmosphere gets “washed” as snowfall continues.
- Avoid snow near roads, driveways, or areas exposed to car exhaust, de-icing chemicals, or heavy foot traffic.
- Never eat discolored, yellow, or visibly dirty snow.
- Skip snow that’s been sitting longer than 24 hours—it accumulates more airborne debris over time.
Practical Safety Checklist
- Collect from a clean, elevated surface: patio table, deck railing, or a bin you set out specifically before the snowfall.
- Collect within the first hour or two of snowfall; later in the storm is better than the very beginning.
- Skip snow cream for higher-risk groups: pregnant women, very young toddlers, and anyone immunocompromised. This is a treat, not a nutritional necessity.
For more detailed food safety guidance, the U.S. Department of Agriculture offers general principles for handling fresh ingredients.
Choosing the Best Snow for Texture
Not all snow is created equal, and ignoring this is the most common reason snow cream disappoints.
- Light, powdery snow – Best for a fluffy, airy result. Common in cold, dry conditions (typical of the Midwest and Upper Plains).
- Wet, heavy snow – Denser and more melt-prone. Common in milder regions or temperatures right around freezing. Use less liquid than the recipe calls for, because the snow already carries extra moisture.
- Packed or older snow – Avoid. It has more environmental debris and won’t whip up light.
Quick tip: If you’re unsure about your snow type, start with only ¾ cup of milk mixture. You can always add more, but you can’t fix a soupy batch. You can also read our guide on healthy dinner recipes.
Flavor Variations
Once you’ve mastered the base recipe, these variations let you customize without adding complexity:
- Chocolate Snow Cream – Whisk 2 tablespoons unsweetened cocoa powder into the milk mixture before folding.
- Maple Snow Cream – Replace the sugar with ⅓ cup pure maple syrup for a nod to the old Appalachian “sugar on snow” tradition.
- Strawberry Snow Cream – Blend ½ cup fresh or frozen strawberries into the milk mixture for a naturally pink, fruity version.
- Condensed Milk Snow Cream – Replace both the milk and sugar with ½ cup sweetened condensed milk. Richer, smoother, and extra sweet.
- Coffee Snow Cream – Stir 1 tablespoon instant espresso powder into the milk mixture for an adult-friendly flavor.

Each flavor variation follows the same method—only the liquid mixture changes.
Common Mistakes to Avoid
- Too much liquid – This is the #1 error. Snow melts as you mix; what looks right at first can quickly turn soupy. Add liquid gradually and check texture after each addition.
- Warm snow – Letting the collected snow sit on the counter while you prep invites melting. Keep it in the freezer until the last moment, and have your milk mixture ready before you pull it out.
- Wrong collection site – Driveways, sidewalks, and anywhere near car exhaust are off-limits even if the snow looks clean. Stick to elevated, undisturbed surfaces.
- Over-mixing – Aggressive stirring melts the snow and destroys the airy texture. Use gentle folding—turn the mixture over on itself rather than beating it.
- Making it ahead – Snow cream is not a make-ahead dessert. Plan to serve within 15–20 minutes of mixing. Time the process so you eat it right away.
- Plastic bowls – Plastic warms up faster than glass or metal. Use metal or glass for collecting and mixing to keep temperatures low.
How to Store (And Why You Usually Shouldn’t)
Snow cream does not store well. Freezing leftovers causes the ice crystals to grow and the texture to turn icy and grainy—nothing like the original fluffy treat. If you absolutely must keep some, transfer it to an airtight container and press plastic wrap directly onto the surface, then freeze. Eat within 24 hours, and expect a denser, less creamy result.
Best practice: make only as much as you’ll eat in one sitting. The beauty of snow cream is that it’s a spontaneous, once-a-storm indulgence. You can also read our guide on easy chicken dinner recipes.
The Science Behind the Perfect Snow Cream
You don’t need to know the science to make great snow cream, but understanding it helps you troubleshoot.
When fresh snow meets the milk-sugar-vanilla mixture, three things happen simultaneously:
- Sugar lowers the freezing point – Dissolved sugar interferes with ice crystal formation, keeping the mixture scoopable rather than rock-hard.
- Fat coats the ice crystals – The fat in milk or cream surrounds each tiny crystal, creating a smooth, creamy mouthfeel instead of a grainy, icy one.
- Gentle folding preserves air – Snow contains countless small air pockets. Folding rather than stirring keeps those pockets intact, which is what gives snow cream its fluffy texture.
This is essentially the same principle behind traditional ice cream making—controlling ice crystal size and incorporating fat and air—but achieved instantly using nature’s own ice instead of a churn. The National Oceanic and Atmospheric Administration (NOAA) notes that snow’s crystalline structure depends on temperature and humidity, which is exactly why different snow types give different results.
A Quick Nutritional Perspective
Snow cream is a treat, not a health food. A typical serving made with whole milk and sugar contains roughly the same calories and sugar as a small bowl of soft-serve ice cream. Heavy cream increases richness and fat content significantly.
For a lighter version, use low-fat milk—the texture will be slightly less creamy but still enjoyable. Because it’s an occasional, seasonal indulgence for most people, portion control is rarely an issue. Treat it as a snow-day memory, not a daily dessert.
Dairy-Free and Vegan Snow Cream Option
Yes, you can make snow cream without dairy—as long as your non-dairy milk is unsweetened and has enough fat for body.
- Canned full-fat coconut milk – Best substitute. Use 1 cup, and add the sugar and vanilla as usual. The high fat content mimics heavy cream.
- Store-bought oat or cashew cream – Works well if it’s the “barista” or “extra creamy” variety.
- Avoid thin almond or rice milk – They produce icy, watery results.
Follow the same method. The fat content in the alternative milk determines how fluffy the final texture will be.
Snow Cream Toppings
While snow cream is perfect plain, a few toppings can elevate it from simple treat to dessert moment:
- Chocolate shavings or a dusting of cocoa powder
- Crushed cookies – graham crackers, shortbread, or chocolate wafers
- A drizzle of warm caramel or chocolate sauce (add just before serving)
- Toasted coconut or chopped nuts
- A sprinkle of cinnamon – especially good with the maple variation
Because snow cream melts faster than traditional ice cream, add toppings at the table, not before you serve.
Frequently Asked Questions
How much snow do I need?
For a standard batch, use about 8 cups of lightly packed snow per 1 cup of liquid. Adjust up or down based on snow moisture.
Can I use snow from my backyard?
Yes, as long as it’s fresh, clean, and collected from an elevated surface away from roads, pets, and chemicals. A clean deck railing or patio table is ideal.
Why did my snow cream turn out watery?
Most likely you added too much liquid too quickly, or the snow was partially melted. Next time, start with less liquid and keep the snow in the freezer until the last moment.
How long does snow cream last?
Best eaten within 15–20 minutes. Leftovers can be frozen, but the texture will be noticeably icier.
Can I make snow cream without a bowl?
Not easily, but a clean plastic container or even a large stainless-steel pot works fine. Avoid aluminum—it can react with the dairy.
Is snow cream safe for kids?
Yes, for most healthy children. If you have concerns, use snow from later in a storm, collect from a clean elevated surface, and supervise tasting.
What if it doesn’t snow where I live?
You can still enjoy a similar treat by shaving ice from a clean ice maker and using the same recipe. It won’t have the exact fluffy texture of real snow, but it’s a decent substitute.
For more cold-weather recipe ideas, browse our collection of other no-churn treats or a hearty winter meal like slow cooker pot roast to round out your snow day.
Conclusion
Snow cream is one of the simplest, most rewarding winter traditions you can make with your family. Three ingredients, five minutes of work, and a bowl of fresh snow are all it takes to create a dessert that tastes like childhood—and that you can’t buy at any store.
The key takeaways: use clean snow from an elevated surface, add your liquid gradually, fold gently, and serve immediately. Once you’ve mastered the base recipe, experiment with the flavor variations and toppings to make it your own.
Ready to make a snow day unforgettable? Grab your mixing bowl and head outside before the snow melts. Your 15-minute frozen treat is waiting.


