If you've ever pulled a gluten-free pizza from the oven only to find a soggy, crumbling, cardboard-like disappointment, you understand the frustration. After years of testing flour ratios, hydration levels, and baking methods, I've developed a crust that delivers genuine crispness on the outside with a satisfying chew on the inside—no gluten required.
This isn't a "it's good for gluten-free" compromise. This is a properly great pizza crust that happens to be free of wheat, barley, and rye. Whether you're managing celiac disease, navigating a gluten sensitivity, or simply curious about better gluten-free baking, this recipe solves the two biggest complaints home cooks face: gumminess and blandness. You can also read our guide on easy cuban recipes at home.
Let's get to work.
Why Most Gluten-Free Pizza Crusts Let You Down
Understanding the science behind failed crusts makes fixing them straightforward.
Wheat flour contains gluten—a protein network that gives dough its elasticity, structure, and ability to trap gas bubbles during rising. Remove gluten, and you lose that entire scaffolding system. Most gluten-free crusts fail for three predictable reasons:
- Using a single flour type instead of a balanced blend that mimics wheat's complex starch and protein profile
- Skipping proper binders like xanthan gum or psyllium husk, which replace gluten's structural role
- Mishandling hydration, leading to dense, gummy centers or crusts that crumble on contact
This recipe addresses all three systematically. The result is a crust that holds its shape when you lift a slice, crisps properly at the edges, and delivers genuine flavor rather than tasting like starch paste.
Ingredients You'll Need
This recipe relies on a blended flour approach, which consistently outperforms single-flour options in both texture and taste. I've found this method works better than many other easy weeknight dinner ideas for achieving restaurant-quality results at home. For more on this, see our guide on easy lasagna recipe.
Dry Ingredients
| Ingredient | Amount | Purpose |
|---|---|---|
| Gluten-free all-purpose flour blend (with xanthan gum included) | 2 cups | Base structure and body |
| Psyllium husk powder | 1 tablespoon | Additional binding and chew |
| Fine sea salt | 1 teaspoon | Flavor and dough strength |
| Sugar | 1 teaspoon | Feeds yeast for proper rise |
| Instant yeast | 2¼ teaspoons (1 packet) | Leavening and flavor development |
Wet Ingredients
| Ingredient | Amount | Purpose |
|---|---|---|
| Warm water (around 110°F / 43°C) | 1 cup | Hydration and yeast activation |
| Olive oil | 2 tablespoons, plus extra for brushing | Tenderness and browning |
| Apple cider vinegar | 1 teaspoon | Improves rise and adds subtle tang |
Optional but Recommended
- Cornmeal or rice flour for dusting the pizza peel or pan
- One egg white for extra structure if your dough feels particularly fragile
- Italian seasoning or garlic powder mixed into the dry ingredients for built-in flavor
Step-by-Step Instructions
Step 1: Activate the Yeast
In a small bowl, combine the warm water, sugar, and instant yeast. Stir gently and let it sit for 5–10 minutes until foamy and fragrant.
If the mixture doesn't foam, your yeast is dead—discard and start fresh with a new packet. This step matters more for gluten-free dough than wheat dough because there's no gluten network to trap naturally occurring gas. The yeast must do all the heavy lifting for rise. For more on this, see our guide on easy air fryer nachos recipe.
Step 2: Mix the Dry Ingredients
In a large mixing bowl, whisk together the gluten-free flour blend, psyllium husk powder, and salt. Whisk thoroughly for at least 30 seconds to break up any clumps. Clumped xanthan gum or psyllium creates hard, gummy pockets in the finished crust.
Step 3: Combine Wet and Dry
Pour the yeast mixture into the dry ingredients. Add the olive oil and apple cider vinegar. Mix with a stand mixer fitted with the paddle attachment (or by hand with a sturdy wooden spoon) for 3–4 minutes until the dough is smooth, uniform, and sticky. For more on this, see our guide on easy breakfast casserole recipe.
Critical observation: Gluten-free pizza dough should resemble thick cake batter or wet play-dough—not a traditional kneadable ball. If your dough is stiff and dry, add warm water one tablespoon at a time until it reaches a soft, scoopable consistency. If it's runny like pancake batter, add flour one tablespoon at a time.
Step 4: Let It Rest and Rise
Cover the bowl tightly with plastic wrap or a damp kitchen towel. Place it in a warm, draft-free spot and let it rise for 30–45 minutes. For more on this, see our guide on gluten free dessert recipes.
The dough won't double dramatically like wheat dough, but it should visibly puff and feel looser and airier than when you started. This rest period also allows the psyllium husk to fully hydrate, which improves texture significantly.
Step 5: Shape the Crust
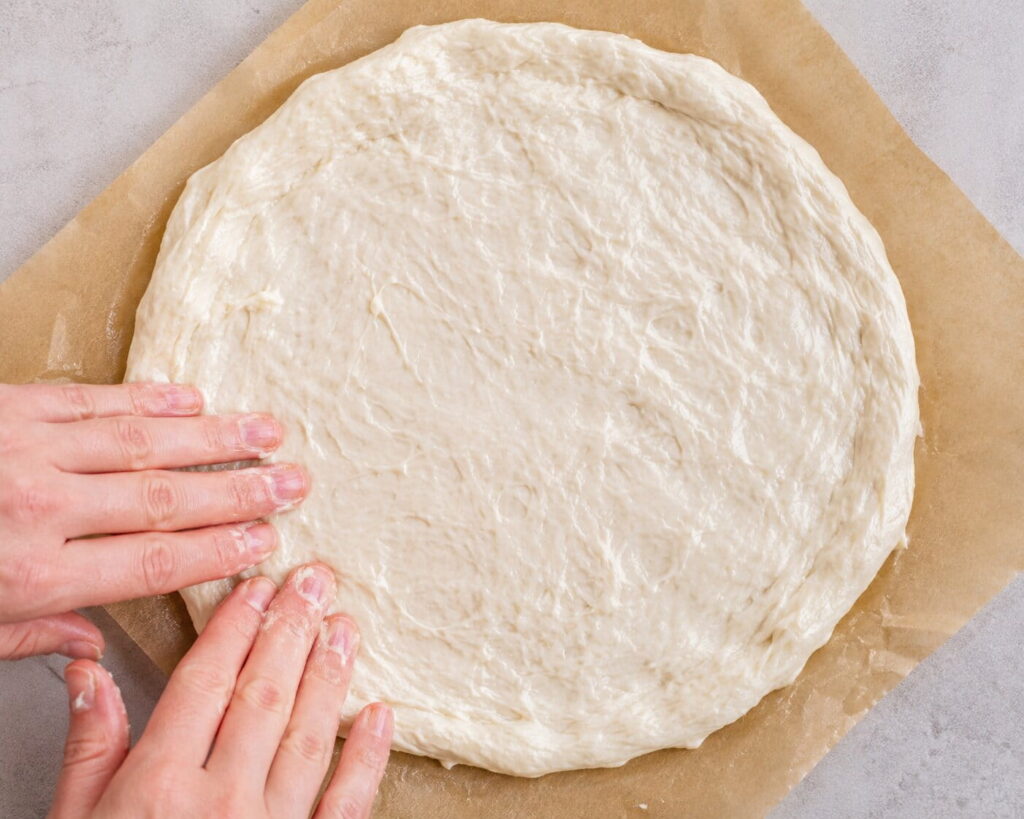
Line a 12-inch pizza pan, baking sheet, or pizza peel with parchment paper. Lightly oil the parchment to prevent sticking.
Wet your hands with cool water (the dough is extremely sticky), then transfer the dough to the parchment. Use your fingertips or a silicone spatula to press the dough into a 10–12 inch circle. Keep it slightly thicker at the edges—about ½ inch—for a defined crust that holds toppings.
Pro tip: If the dough keeps springing back, let it rest uncovered for 5 minutes, then continue pressing. Gluten-free dough relaxes more slowly than wheat dough.
Step 6: Par-Bake the Crust
This is the most important step in the entire process for achieving a crispy, non-soggy result.
Preheat your oven to 425°F (218°C) with a rack in the center position. Brush the shaped dough generously with olive oil, covering all exposed surfaces.
Bake for 10–12 minutes, until the edges turn light golden brown and the surface looks dry and set, not wet or shiny.
Why this works: Par-baking creates a dry, structured barrier between the dough and the toppings. Without this step, moisture from the sauce and cheese seeps into the raw dough, creating a gummy, undercooked center that collapses when you try to lift a slice.
Step 7: Add Toppings and Finish Baking
Remove the par-baked crust from the oven. Add your sauce, cheese, and toppings in thin, even layers. Go lighter on sauce than you would with a wheat crust—excess moisture is the enemy of crispness.
Return to the oven and bake for another 10–14 minutes, until the cheese is fully melted and bubbling, and the crust edges are deeply golden brown.
For maximum crispiness, switch the oven to broil for the final 1–2 minutes. Watch closely—broilers vary in intensity, and the crust can burn quickly.
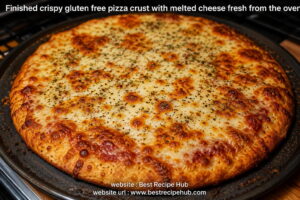
Fresh from the oven: a properly browned, crispy gluten-free pizza crust with melted cheese and even browning
Pro Tips for the Crispiest Crust
Through repeated testing, these small adjustments made the biggest measurable difference in texture:
- Use a pizza stone or steel preheated for at least 30 minutes. The intense bottom heat dramatically improves crust crispness. If you don't have one, flip a baking sheet upside down and preheat it.
- Don't skip the oil on the par-bake. Olive oil creates a moisture barrier and promotes browning.
- Spread sauce thinly—about 3–4 tablespoons for a 12-inch pizza. Excess moisture is the number one cause of soggy gluten-free crusts.
- Let refrigerated dough come to room temperature before shaping. Cold dough is stiffer and harder to spread evenly, leading to torn crusts and uneven thickness.
- Use a light hand with cheese. Overloading traps steam against the crust and softens the bottom. A single layer is sufficient.
- Let the finished pizza rest for 3–5 minutes before slicing. This allows the structure to set, preventing toppings from sliding off.
Common Mistakes to Avoid
Based on the most frequent issues home cooks report, watch for these pitfalls:
- Skipping the binder. Without xanthan gum or psyllium husk, the crust will crumble into pieces the moment you try to lift a slice.
- Rolling the dough too thin. Gluten-free crusts need slightly more thickness (about ¼ to ⅓ inch) for structural support. Thin crusts tear easily and dry out faster.
- Using cold water for the yeast. Yeast activation requires warmth. Water below 100°F slows or stops the process entirely.
- Not preheating the oven fully. A properly hot oven is essential for oven spring and crisp texture. Rushing this step guarantees disappointment.
- Adding too many wet toppings. Fresh tomatoes, excess sauce, watery vegetables, or wet mozzarella can sabotage the texture. Pat ingredients dry with paper towels before adding.
- Opening the oven door repeatedly. Heat loss during baking prevents proper browning and crispness.
Storage and Reheating
Gluten-free crust dries out faster than wheat-based crust, so proper storage technique matters.
Refrigerating Leftovers
Store leftover slices in an airtight container with a sheet of parchment between layers. Refrigerate for up to 3 days.
Freezing for Later
Freeze individual slices by wrapping each one tightly in parchment, then aluminum foil, then placing in a freezer bag. Properly wrapped, they keep for up to 2 months.
Reheating Without Sogginess
Do not use the microwave. It turns gluten-free crust rubbery and tough within seconds.
Instead:
- Oven method (best): Reheat at 375°F for 8–10 minutes directly on the oven rack or a preheated baking sheet.
- Air fryer method: Reheat at 350°F for 4–6 minutes for an especially crispy result. If you enjoy versatile cooking appliances, this method works beautifully alongside quick air fryer recipes.
- Skillet method: Reheat in a dry non-stick skillet over medium heat for 3–4 minutes, covered for the first 2 minutes.
- For frozen slices, add 3–5 extra minutes without thawing first.
Can You Make the Dough Ahead of Time?
Yes, and this is actually a smart strategy for weeknight convenience.
Prepare the dough through Step 4 (after the rise). Wrap the bowl tightly with plastic wrap and refrigerate for up to 24 hours. The next day, let the dough sit at room temperature for 20–30 minutes before shaping and proceeding with par-baking.
You can also par-bake the crust fully (Step 6), let it cool completely, wrap it tightly, and freeze it for up to 2 months. When you're ready for pizza, add toppings directly to the frozen par-baked crust and bake at 425°F for 12–15 minutes.
Understanding Flour Blends for Gluten-Free Pizza
Not all gluten-free flour blends perform equally in pizza crust. Here's what to look for:
Best Blends for Pizza Crust
A blend containing rice flour, tapioca starch, and potato starch produces the most wheat-like texture. These three ingredients work together: rice flour provides structure, tapioca adds chew, and potato starch contributes tenderness and browning.
Many keto-friendly baking recipes use almond or coconut flour instead, but these produce denser, more delicate crusts that don't hold up well to heavy toppings. They work best for thin, cracker-style pizzas.
Blends to Avoid
Single-flour options (pure rice flour, pure almond flour, pure chickpea flour) lack the balanced starch profile needed for proper structure. Avoid them unless you're prepared to add significant binders and adjust hydration carefully.
Checking Your Blend
Read the ingredient label. If your flour blend already contains xanthan gum, reduce or skip the psyllium husk powder in this recipe. Using both in full quantity can produce an unpleasantly gummy texture.
How Thickness Affects Results
Gluten-free dough behaves differently at different thicknesses:
| Thickness | Result | Best For |
|---|---|---|
| ⅛ inch (cracker-thin) | Very crispy, fragile, dries quickly | Appetizer pizzas, gluten-free flatbreads |
| ¼ inch (standard thin) | Crispy edges, slight chew in center | Most home pizzas, holds moderate toppings |
| ⅓ inch (medium) | Good chew throughout, holds heavy toppings | Loaded pizzas, thicker crust lovers |
| ½ inch (thick crust) | Dense, bread-like center, needs longer par-bake | Deep-dish styles, gluten-free Sicilian |
For first-time makers, aim for ¼ to ⅓ inch. This thickness provides the best balance of structural integrity and pleasing texture.

Common gluten-free pizza crust questions answered with practical solutions from years of testing
Frequently Asked Questions
What is the best flour for gluten-free pizza crust?
A blended gluten-free all-purpose flour containing rice flour, tapioca starch, and potato starch works best. These three components together mimic the texture and structure of wheat flour more effectively than any single-flour option like almond or coconut flour. Look for blends that clearly list these ingredients.
Why is my gluten-free pizza crust gummy in the middle?
Gumminess usually comes from skipping the par-baking step or using too much liquid in the dough. Par-baking the crust before adding toppings creates a dry, stable base that prevents a soggy center. If you're already par-baking, try reducing the water by 2 tablespoons next time.
Do I need xanthan gum for gluten-free pizza dough?
Yes—unless your flour blend already includes it. Xanthan gum or psyllium husk acts as a binder, replacing the elasticity gluten normally provides. Without it, the crust will crumble when you try to lift a slice.
Can I make gluten-free pizza crust without yeast?
Yes, though the texture will be denser, flatter, and more cracker-like. Yeast-based crusts produce better rise and a more authentic pizzeria-style texture. If you need a yeast-free version, try a recipe designed for baking powder or yogurt-based dough, which have different hydration requirements.
How thick should gluten-free pizza dough be?
Aim for about ¼ to ⅓ inch thickness. Gluten-free dough needs slightly more thickness than wheat dough to maintain structural integrity and avoid tearing when lifted. Thinner than ¼ inch often results in a crust that breaks apart.
Can gluten-free pizza dough be frozen?
Yes. Both raw shaped dough (before par-baking) and fully par-baked crusts freeze well. Wrap tightly in plastic wrap, then foil, and freeze for up to two months. Par-baked crusts are more convenient since they go straight from freezer to oven with toppings.
Why does my gluten-free crust fall apart when I pick up a slice?
This typically happens when the dough lacks enough binder (xanthan gum or psyllium husk) or wasn't par-baked long enough to set its structure before toppings were added. It can also result from pressing the dough too thin. Check all three factors.
Is gluten-free pizza crust healthier than regular pizza crust?
Not inherently. It's not lower in calories, carbohydrates, or fat by default. For people with celiac disease or gluten sensitivity, it's a necessary alternative. The nutritional profile depends entirely on the flour blend you choose—some are more nutrient-dense than others. If you're exploring different dietary approaches, there are also many nutritious weeknight meal options that can complement a gluten-free lifestyle.
Final Thoughts
A truly great gluten-free pizza crust comes down to technique, not luck. The right flour blend, proper hydration, a patient rise, and that non-negotiable par-baking step are what separate a memorable pizza from a disappointing one.
Once you've made this recipe two or three times, you'll notice how consistent and forgiving the method becomes. The same dough works for calzones, flatbreads, and even gluten-free garlic knots. It's a foundational recipe worth mastering.
This isn't a compromise. It's a crust that stands on its own—crispy edges, satisfying chew, and all.


