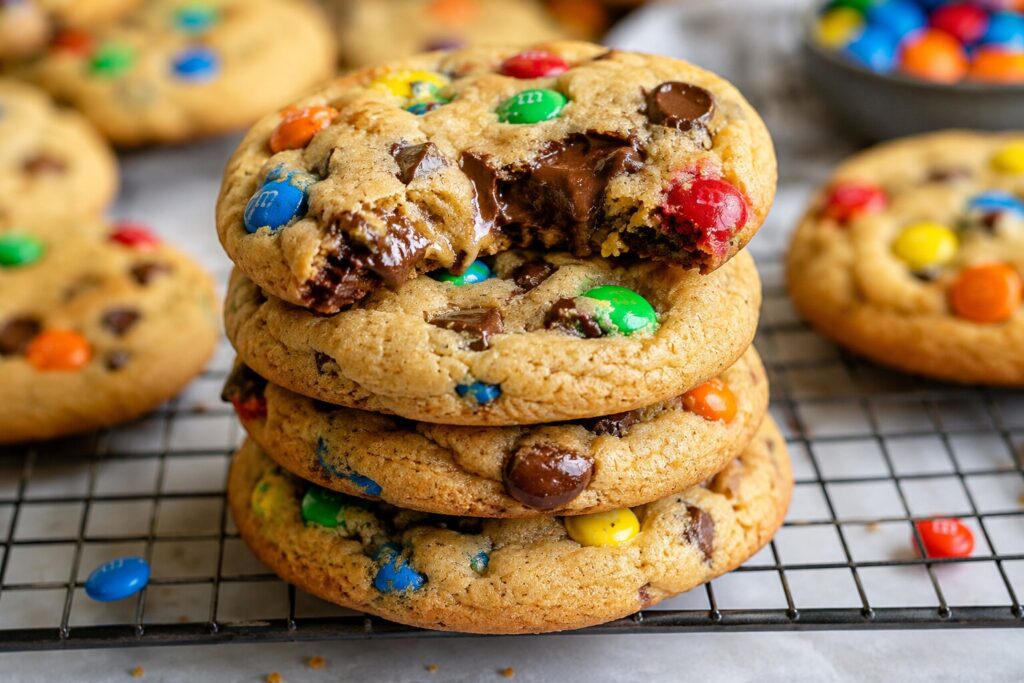
There's a moment every home baker knows: it's late, you're craving a warm cookie, and every recipe you find tells you to chill the dough for two hours — or overnight. By then, the craving has passed.
This M&M cookie recipe was built for that exact moment. After extensive testing with melted butter, flour ratios, and bake temperatures, the result is a thick, bakery-style cookie with crisp edges and a soft, chewy center — ready from start to finish in about 30 minutes. No chilling required. You can also read our guide on best baked chicken thigh recipes.
Why You Can Skip the Chill Time
Most cookie recipes require chilling because cold butter melts slowly in the oven, preventing excessive spread. That works, but it's not the only path to a thick cookie. This recipe uses three structural techniques to achieve the same result without waiting:
- Cooled melted butter – Melting butter alters its fat structure, creating a chewier texture without refrigeration. The key is letting it cool to just above room temperature before mixing.
- Increased flour ratio – A slightly higher proportion of flour relative to fat keeps the dough sturdy enough to hold its shape immediately.
- Cornstarch for tenderness – A small amount of cornstarch traps moisture and softens the crumb, mimicking the gluten relaxation that chilling typically provides.
The dough is ready to scoop and bake the moment you finish mixing. No plastic wrap, no refrigerator space, no overnight wait.
Ingredients for Bakery-Style M&M Cookies
| Ingredient | Amount | Notes |
|---|---|---|
| Unsalted butter | 1 cup (2 sticks) | Melted and cooled 10 minutes |
| Brown sugar (light or dark) | 1 cup, packed | Adds moisture and chew |
| Granulated sugar | ½ cup | Balances sweetness and texture |
| Large eggs | 2 | Room temperature for even blending |
| Vanilla extract | 2 teaspoons | Pure vanilla, not imitation |
| All-purpose flour | 2 ¾ cups (345g) | Spoon and level for accuracy |
| Cornstarch | 1 teaspoon | Keeps centers soft |
| Baking soda | 1 teaspoon | Helps spread and browning |
| Baking powder | ½ teaspoon | Adds lift |
| Salt | 1 teaspoon | Enhances all flavors |
| M&M's | 1 ½ cups | Divided (1 cup in dough, ½ cup for topping) |
Ingredient Choices That Matter
Butter temperature is the single most important variable. Melted butter that's still hot will make the dough greasy and cause flat cookies. Let it cool until you can comfortably hold your hand against the bowl — roughly 10 minutes. You can also read our guide on easy breakfast casserole recipe.
Brown sugar isn't interchangeable with white. The molasses in brown sugar adds moisture and acidity, which directly creates that soft, chewy texture bakeries are known for. If you only have white sugar, add one tablespoon of molasses to compensate.
Room-temperature eggs blend more evenly into the butter-sugar mixture. Cold eggs can seize the butter, creating an uneven dough. If you forgot to take them out early, submerge them in warm water for five minutes.
Step-by-Step Instructions
1. Preheat and Prepare
Preheat your oven to 375°F (190°C) . Line two baking sheets with parchment paper.
This higher temperature helps set the edges quickly while keeping the centers soft — the exact mechanism behind that bakery-style contrast.
2. Combine Wet Ingredients
In a large bowl, whisk together the cooled melted butter, brown sugar, and granulated sugar until smooth and slightly glossy — about 1 minute by hand. Add the eggs and vanilla extract, whisking until fully incorporated. The mixture should look pale and slightly thickened.
3. Mix Dry Ingredients Separately
In a separate bowl, whisk together the flour, cornstarch, baking soda, baking powder, and salt. Mixing dry ingredients separately ensures even distribution of leavening agents — skipping this step is one of the most common reasons cookies bake unevenly.
4. Form the Dough
Add the dry ingredients to the wet mixture in two batches, folding gently with a spatula. Stop as soon as no dry streaks remain. Overmixing develops gluten, which produces tough, dense cookies instead of tender ones. Fold in 1 cup of M&M's, reserving the rest for topping.
5. Scoop and Top
 Dough balls with extra candy pressed into the tops for that loaded bakery look
Use a 2-tablespoon cookie scoop to portion the dough onto your prepared sheets, spacing them about 2 inches apart. Press a few reserved M&M's into the top of each dough ball. This is the same trick bakeries use to make cookies look packed with candy straight from the oven.
6. Bake
Bake for 9 to 11 minutes, until the edges are set and lightly golden but the centers still look slightly underdone. Resist the urge to leave them longer — this is where most home bakers go wrong. Cookies that look "fully baked" in the oven will be dry once cooled.
7. Cool on the Pan
Let the cookies rest on the baking sheet for 5 minutes before transferring to a wire rack. They continue cooking from residual heat during this time, which creates that soft, set-but-chewy center.
What Makes Bakery Cookies Thicker
Bakery cookies look different from homemade ones for three controllable reasons:
- Larger dough portions – Bakeries use 2 to 3 tablespoons per cookie, not the teaspoon-sized drops many home recipes suggest.
- Drier dough consistency – A slightly higher flour-to-fat ratio helps cookies hold height during baking.
- The cold pan trick – For extra height, place scooped dough balls in the freezer for just 10 minutes while your oven preheats. This firms the outside enough to slow spread without changing your overall timeline. It's optional but makes a noticeable difference.
Common Mistakes and How to Avoid Them
Butter that's too warm – If melted butter is still hot when mixed with sugar, it begins cooking the eggs and creates greasy, flat cookies. Always let it cool for at least 10 minutes.
Inaccurate flour measurement – Scooping flour directly from the bag compacts it, adding up to 20% more than intended. Spoon flour into your measuring cup and level it off with a knife — or better yet, weigh it (2 ¾ cups = 345g).
Overbaking – Cookies continue baking after leaving the oven. If you wait until they look done inside, they'll be overdone by the time they cool. Pull them when the centers still appear slightly soft.
Crowded pans – Cookies need about 2 inches of space for proper airflow. Overcrowding leads to uneven shapes and inconsistent baking.
Using only regular M&M's – Mixing regular and mini M&M's distributes chocolate more evenly and creates better visual texture in every bite.
Storage and Freezing
Room temperature storage – Keep cookies in an airtight container for up to 5 days. Add a slice of bread to the container to maintain softness by regulating moisture.
Freezing baked cookies – Cool completely, freeze in a single layer, then transfer to a freezer bag for up to 3 months. Thaw at room temperature for 20 minutes before serving.
Freezing raw dough – Scoop dough balls onto a tray, freeze until solid, then transfer to a freezer bag. Bake straight from frozen, adding 2 to 3 minutes to the bake time. This is a major advantage of a no-chill dough — you can prepare a batch ahead and bake fresh cookies in under 15 minutes.
Recipe Variations
- Brown butter M&M cookies – Brown the butter before cooling for a nutty, caramelized depth of flavor. Allow it to cool completely before using.
- Peanut butter M&M cookies – Replace ¼ cup of butter with creamy peanut butter for a richer, denser texture.
- Holiday M&M cookies – Use seasonal M&M colors (red and green for Christmas, pastels for Easter, red-white-blue for Independence Day) without changing the recipe itself.
- Stuffed M&M cookies – Press a small piece of chocolate or caramel into the center of each dough ball before baking for a molten surprise.
Expert Tips for Consistent Results
- Weigh your flour – 2 ¾ cups should weigh approximately 345 grams. Volume measurements can vary by up to 25%, which is often the hidden reason two bakers get different results from the same recipe.
- Rotate pans halfway through baking – Most home ovens have hot spots, and rotating ensures even browning.
- Use parchment paper, not greased pans – Greased pans encourage extra spreading. Parchment provides a neutral, consistent surface.
- Let baking sheets cool between batches – Placing dough on a hot pan causes premature spreading before the cookies even enter the oven.
 A cross-section showing the ideal bakery-style texture: crisp outside, soft inside
These aren't arbitrary preferences — they're testable variables that consistently separate flat, greasy cookies from thick, chewy, bakery-quality ones.
Frequently Asked Questions
Do M&M cookies need to be refrigerated after baking?
No. Store them in an airtight container at room temperature for up to 5 days. Refrigeration dries out baked cookies.
Why did my M&M cookies turn out flat?
Flat cookies are almost always caused by butter that was too warm when mixed, inaccurate flour measurement, or baking sheets that were still hot from a previous batch. Cooling melted butter for 10 minutes and using room-temperature pans solves this in most cases.
Can I use mini M&M's instead of regular ones?
Yes. Mini M&M's distribute more evenly through the dough. Many bakers combine both regular and mini sizes for better texture and visual appeal — one practical observation from repeated testing.
Can I freeze M&M cookie dough for later?
Yes. Scoop into balls, freeze until solid, then store in a freezer bag for up to 3 months. Bake directly from frozen, adding 2 to 3 minutes to the bake time. This makes the dough ideal for quick desserts when unexpected guests arrive — or just a Tuesday night craving.
Why are bakery M&M cookies thicker than homemade ones?
Bakeries use larger dough portions (2–3 tablespoons), a slightly drier dough consistency, and sometimes a brief freezer rest before baking. All three factors can be replicated at home — and this recipe incorporates them directly.
How do I keep M&M cookies soft for several days?
Store cookies in an airtight container with a slice of plain bread. The bread releases moisture that keeps the cookies soft without making them soggy. Replace the bread slice after two days.
Conclusion
This easy M&M cookie recipe proves that bakery-style thickness doesn't require hours of chilling. By using cooled melted butter, a precise flour ratio, and cornstarch for tenderness, you get crisp-edged, chewy-center cookies in about 30 minutes — no waiting required.
The method works consistently because it addresses spread control at the dough level rather than relying on temperature manipulation later. Whether you're baking for a party, a holiday, or simply because it's 8 p.m. and you want a warm cookie, this recipe delivers.
Your next step: Try a batch tonight — and if you want to prepare ahead, make extra dough balls and freeze them for fresh cookies anytime. For more easy dessert ideas, browse our collection of no-bake desserts. And if you're planning a full menu around these cookies, our easy weeknight dinners will round out the meal nicely.


