
If you have ever ordered chicken piccata at a restaurant and thought, “I wish I could make this at home,” you are not alone. This chicken piccata recipe is one of the most beginner-friendly yet genuinely impressive dishes in the Italian-American repertoire.
Here is why home cooks keep coming back to it:
- Ready in 25 minutes flat – start to finish.
- Built from pantry staples you likely already have.
- The lemon caper sauce tastes like it took hours to build.
- Perfect for a weeknight dinner or a proper dinner party.
This guide walks you through every step – from pounding the chicken to building a silky, restaurant-grade sauce – with zero guesswork.
What Is Chicken Piccata?
Chicken piccata is a classic Italian-American dish built around three core elements:
- Thin, pounded chicken cutlets lightly dredged in flour.
- A quick, high-heat sear that creates a golden, flavour-packed crust.
- A bright pan sauce made with lemon juice, capers, white wine, and butter.
The word piccata refers to the Italian cooking method – thin, flattened cutlets sautéed rapidly over high heat. The dish originates from northern Italy, where piccata di vitello (veal piccata) was the original preparation. Italian immigrants brought it to the United States in the early 20th century, and chicken replaced the more expensive veal as the everyday protein. Today, the chicken piccata recipe is a fixture on Italian-American menus from New York to Los Angeles – and it translates perfectly to the home kitchen.
Why This Chicken Piccata Recipe Works Every Time
Not all piccata recipes deliver consistent results. This one does, for four key reasons:
- Pounding is non-negotiable. Even thickness means even cooking. An unpounded breast cooks unevenly – dry on the edges, undercooked in the centre.
- The flour dredge builds the sauce. As the flour-coated chicken sears, tiny caramelised bits – called fond – release into the pan. That fond becomes the flavour base for your sauce. Never skip it.
- Butter finishes the sauce off the heat. This technique, called mounting, keeps the sauce smooth, creamy, and glossy. Adding butter to a boiling pan breaks the emulsion and turns the sauce greasy.
- Caper brine is a secret weapon. A small splash stirred in at the end deepens the savouriness of the sauce without any extra ingredients or effort.
Ingredients You Will Need
For the Chicken
- 4 boneless, skinless chicken breasts – about 6 oz each
- ½ cup all-purpose flour – for dredging
- 1 teaspoon kosher salt
- ½ teaspoon freshly ground black pepper
- 3 tablespoons olive oil – divided
For the Lemon Caper Sauce
- 3 tablespoons unsalted butter – divided, kept cold until use
- 3 garlic cloves – minced
- ½ cup dry white wine – Pinot Grigio or Sauvignon Blanc recommended
- ½ cup low-sodium chicken broth
- ⅓ cup fresh lemon juice – approximately 2 large lemons
- 2 tablespoons capers – drained, plus 1 teaspoon of the brine
- 2 tablespoons fresh flat-leaf parsley – roughly chopped
- Lemon slices – for garnish
Pro tip: Always use fresh lemon juice, not bottled. Bottled juice has a flat, metallic edge that dulls the bright citrus punch this sauce depends on.
Step-by-Step Instructions
01: Pound and Season the Chicken
- Place each chicken breast between two sheets of plastic wrap or inside a zip-lock bag.
- Using a meat mallet or heavy rolling pin, pound each breast to an even ½-inch thickness – about 30 seconds per piece.
- Season both sides generously with kosher salt and black pepper.
- Place the flour in a shallow dish. Dredge each cutlet lightly, pressing gently to adhere.
- Shake off all excess flour – you want a thin, uniform coating, not a thick crust.
02: Sear the Chicken to a Golden Crust
- Heat 2 tablespoons of olive oil in a large stainless-steel or cast-iron skillet over medium-high heat until the oil shimmers and moves freely.
- Add the chicken cutlets in a single layer. Do not crowd the pan – work in two batches if needed.
- Cook for 3 to 4 minutes per side, without moving them, until a deep golden-brown crust forms.
- Check the internal temperature – it should read 165°F on an instant-read thermometer.
- Transfer the seared chicken to a plate and tent loosely with foil to keep warm.

03: Build the Lemon Caper Sauce
- Do not wipe the pan – those browned bits are pure flavour.
- Reduce the heat to medium. Add 1 tablespoon each of olive oil and butter.
- Once the butter foams, add the minced garlic and sauté for 30 seconds – fragrant but not browned.
- Pour in the white wine and scrape up all the golden bits from the pan bottom using a wooden spoon – this is your flavour base.
- Let the wine reduce by half – about 2 minutes.
- Add the chicken broth and lemon juice. Stir to combine and bring to a gentle simmer.
- Let the sauce reduce for 3 to 4 minutes, until it lightly coats the back of a spoon.
- Stir in the capers and 1 teaspoon of caper brine.
4: Mount the Sauce With Butter
- Remove the pan from the heat entirely.
- Add the remaining 2 tablespoons of cold butter, one tablespoon at a time.
- Swirl the pan constantly as each piece melts – do not stir with a spoon.
- Watch the sauce transform from thin and watery to glossy, velvety, and restaurant-quality.
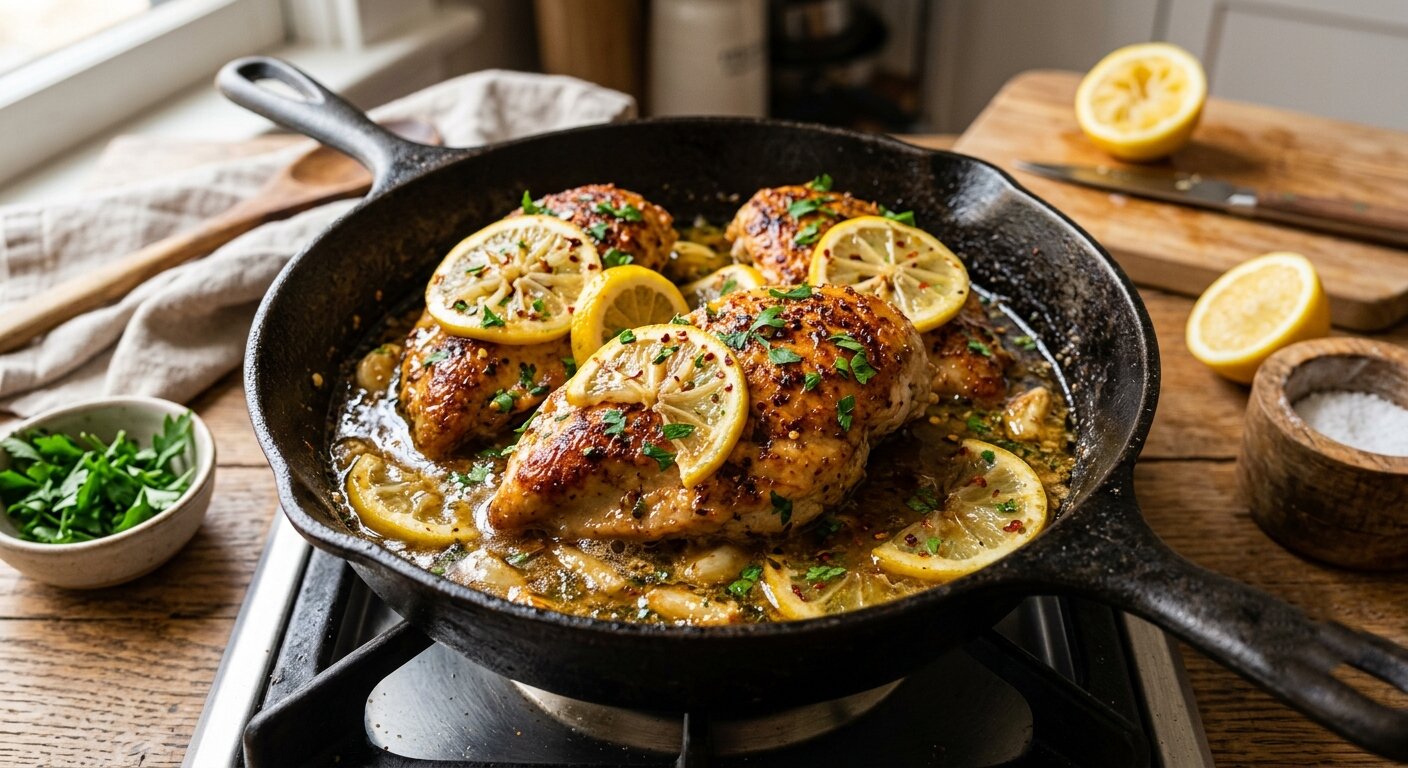
05: Finish and Plate
- Return the seared chicken cutlets to the pan.
- Spoon the sauce generously over each piece.
- Place over low heat for 1 to 2 minutes so the chicken absorbs the sauce flavours.
- Scatter fresh parsley over the top.
- Arrange thin lemon slices as garnish and serve immediately.

What to Serve With Chicken Piccata
The lemon caper sauce is rich enough to anchor a whole meal. Choose a side that can absorb it:
- Angel hair pasta or thin linguine – the most traditional and popular pairing.
- Steamed white or jasmine rice – a lighter, everyday option that lets the sauce shine.
- Creamy mashed potatoes – a comfort-food pairing that loves a buttery, acidic sauce.
- Roasted asparagus or broccolini – adds colour and a slight bitterness that beautifully balances the lemon.
- Crusty Italian bread or ciabatta – for mopping up every last drop of sauce from the pan.
Common Mistakes to Avoid
Even confident cooks stumble on this recipe. Here are the most common errors and how to fix them:
- Skipping the pounding step. Thick, uneven chicken breasts cook unevenly. The thinner edges dry out before the centre reaches 165°F. Always pound.
- Not shaking off excess flour. Too much flour creates a gummy, pasty coating instead of a light, crisp crust. Dredge, then shake firmly.
- Overcrowding the pan. Two cutlets pressed together will steam instead of sear. Work in batches – a proper sear requires direct, unobstructed contact with the hot pan.
- Burning the garlic. Garlic turns bitter in under 60 seconds over high heat. Always add it after reducing to medium heat.
- Adding butter to a boiling sauce. The emulsion breaks instantly in a boiling liquid. Pull the pan fully off the heat before mounting the butter.
- Using bottled lemon juice. The acidity profile is different from fresh and will throw off the sauce balance, making it taste flat rather than bright.
Make-Ahead and Storage Tips
Chicken piccata is best served immediately, but here is how to manage it practically:
- Refrigerator storage: Place leftovers in an airtight container for up to 3 days.
- Reheating: Warm gently in a skillet over low heat with a splash of chicken broth to loosen the sauce. Avoid microwaving – it overcooks the chicken and breaks the emulsion.
- Freezer storage: The chicken freezes well for up to 2 months. Butter sauces separate on thawing, so freeze the chicken only and make a fresh sauce when reheating.
- Meal prep shortcut: Pound, season, and dredge the chicken up to 4 hours ahead and store uncovered on a wire rack in the refrigerator. The coating dries slightly, which actually improves the sear.
Variations Worth Trying
Once you have mastered the base chicken piccata recipe, these simple upgrades are worth exploring:
- Chicken Piccata With Artichokes – Add ½ cup of quartered marinated artichoke hearts along with the capers. Briny, hearty, and deeply savoury.
- Creamy Chicken Piccata – Stir in 2 tablespoons of heavy cream at the butter-mounting stage for a more indulgent, softer acidity.
- Gluten-Free Piccata – Replace all-purpose flour with almond flour or a certified GF all-purpose blend. The crust is slightly different in texture but equally delicious.
- Shrimp Piccata – Use the exact same sauce recipe with large peeled shrimp. Shrimp cook in just 2 to 3 minutes per side, making this an even faster dinner.
Nutrition Overview (Per Serving, Approximate)
| Nutrient | Amount |
| Calories | 390 kcal |
| Protein | 42g |
| Total Fat | 19g |
| Saturated Fat | 7g |
| Carbohydrates | 10g |
| Sodium | 520mg |
Frequently Asked Questions
What is chicken piccata made of?
Chicken piccata is made from thinly pounded chicken breasts dredged in flour, pan-fried in olive oil until golden, then served with a pan sauce of fresh lemon juice, capers, white wine, chicken broth, and butter. Fresh flat-leaf parsley is added as a finishing garnish.
What does piccata mean in cooking?
Piccata is an Italian culinary term describing a method where meat is sliced thin, dredged in flour, and sautéed quickly over high heat before being finished in a bright, acidic pan sauce. It derives from the Italian word piccato, meaning sharp or larded.
Can I make chicken piccata without white wine?
Yes. Replace the white wine with an equal amount of additional low-sodium chicken broth plus 1 teaspoon of white wine vinegar or apple cider vinegar. The vinegar restores the acidity the wine would have contributed to the sauce.
How do you keep chicken piccata from tasting too sour?
Balance acidity with fat. Use the full amount of butter called for and avoid exceeding the stated lemon juice measurement. Taste the sauce before returning the chicken to the pan. If it is still too sharp, stir in a small pinch of granulated sugar to round out the edge.
What is the difference between chicken piccata and chicken francese?
Chicken piccata uses a plain flour dredge and capers for briny depth. Chicken francese uses an egg-and-flour coating for a softer, eggy crust, and contains no capers. Both use a lemon butter sauce, but piccata has a crispier finish and a distinctly savoury, briny flavour.
Can I use chicken thighs instead of chicken breasts for piccata?
Yes. Boneless, skinless chicken thighs stay noticeably juicier than breasts. Pound them to an even ½-inch thickness and add 1 to 2 extra minutes of cook time per side, as thighs are slightly denser and fattier.
Do I have to use capers in chicken piccata?
Capers are a defining ingredient in traditional piccata and contribute essential briny, tangy depth. If unavailable, thinly sliced green olives make a reasonable substitute with a similar salty, acidic quality. The dish will taste slightly different but will still be very good.
How long does chicken piccata last in the refrigerator?
Properly stored in an airtight container, leftover chicken piccata keeps for up to 3 days. Reheat gently in a skillet over low heat with a splash of chicken broth to restore the sauce and avoid drying out the chicken.