

If you’ve ever pulled a dry, rubbery chicken breast out of the oven and felt a wave of disappointment – you’re not alone. It’s one of the most common kitchen frustrations in the world.
That’s exactly why air fryer chicken breast has become a weeknight game-changer for millions of home cooks. The air fryer circulates hot air at high velocity, creating a golden, lightly crisp exterior while sealing in moisture that a conventional oven simply can’t match.
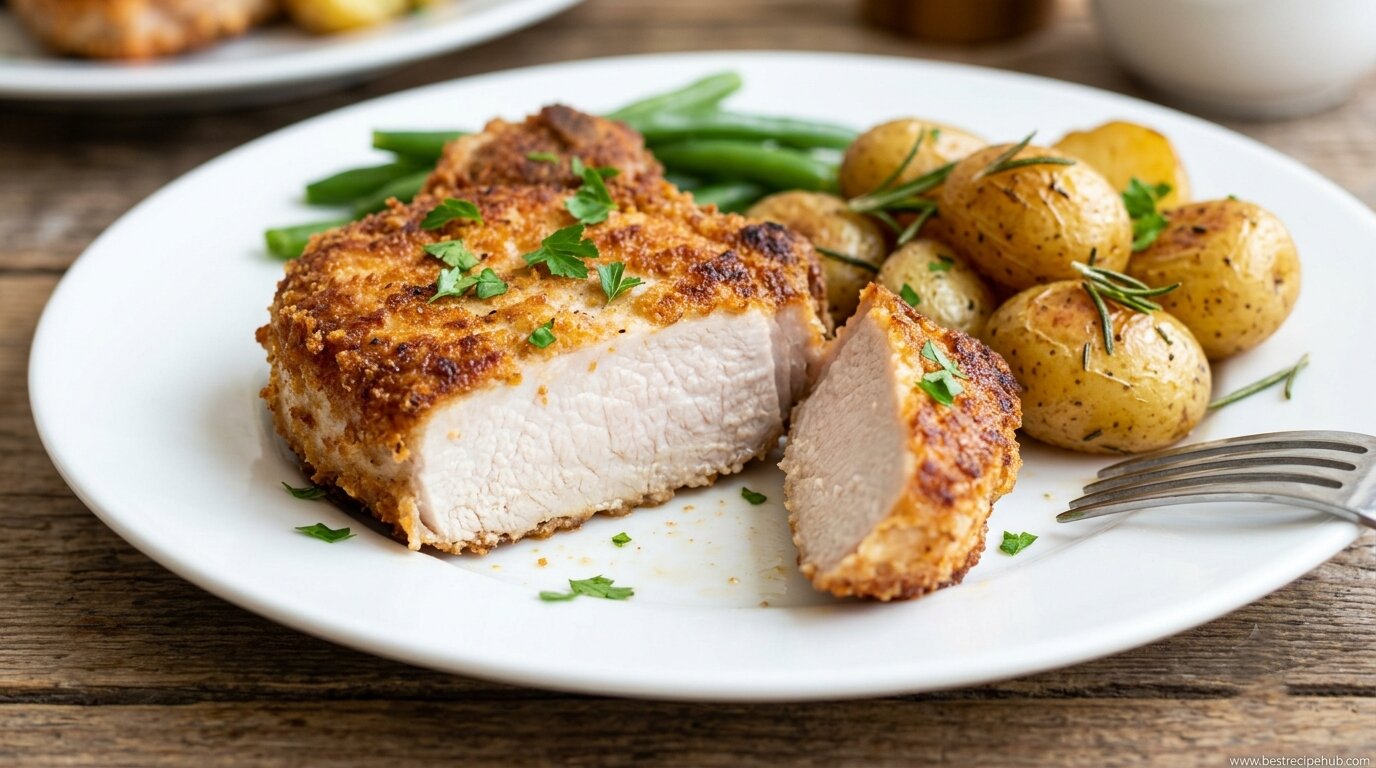
After testing dozens of variations – different thicknesses, temperatures, marinades, and resting times – this method consistently delivers chicken that is:
- Juicy and tender on the inside
- Golden and lightly crispy on the outside
- Fully cooked and safe to eat in just 15 minutes
No guesswork. No babysitting. Just reliably excellent chicken, every single time.
Why Air Fryer Chicken Breast Beats Oven-Baked Every Time
The air fryer wins on almost every front. Here’s exactly why:
| Factor | Air Fryer | Conventional Oven |
| Cook Time | 14–16 minutes | 25–30 minutes |
| Oil Needed | ~1 teaspoon | 1–2 tablespoons |
| Exterior Texture | Light, golden crust | Pale, soft |
| Moisture Retention | High | Moderate |
| Cleanup | 2 minutes | 10+ minutes |
Beyond the numbers, the core advantages are:
- Rapid surface browning – Intense circulating heat locks in flavor before juices can escape.
- 360-degree airflow – Eliminates hot spots, so no raw center with overcooked edges.
- Less oil, more flavor – A light coating is all you need for a beautifully seasoned crust.
- Consistent repeatability – Once you nail the temperature and timing, you get the same great result every cook.
Ingredients for Perfect Air Fryer Chicken Breast
Great chicken starts before it touches the basket. Here’s everything you need:
The Ingredient List
- 2 boneless, skinless chicken breasts (6–8 oz each)
- 1 teaspoon olive oil (or avocado oil)
- 1 teaspoon garlic powder
- 1 teaspoon smoked paprika
- ½ teaspoon onion powder
- ½ teaspoon dried oregano
- ½ teaspoon kosher salt
- ¼ teaspoon black pepper
- Optional: pinch of cayenne or ½ teaspoon brown sugar for a sweet-savory finish
Why Each Spice Earns Its Place
- Smoked paprika – Deep color and subtle smokiness without heat.
- Garlic powder – Savory backbone that amplifies the chicken’s natural flavor.
- Onion powder – Rounds out the profile and helps the crust brown evenly.
- Dried oregano – Adds a herbal note so the seasoning doesn’t taste flat.
- Kosher salt – Draws out surface moisture, helping spices penetrate deeper.
Step-by-Step: How to Cook Air Fryer Chicken Breast
Follow each step carefully. Every one has a specific purpose – skip one and you’ll feel the difference.
Step 1: Pound to Even Thickness
- Place each breast in a zip-lock bag or between two sheets of plastic wrap.
- Use a meat mallet or rolling pin to pound the thicker end to a uniform ¾-inch thickness.
- Why it matters: Uneven thickness is the #1 cause of dry chicken. The thin end overcooks while the thick end catches up.
Step 2: Pat Dry and Season
- Pat the chicken completely dry with paper towels on both sides.
- Drizzle with olive oil and rub it across the entire surface.
- Mix all spices together in a small bowl.
- Coat both sides generously with the spice mixture, pressing lightly to adhere.
- Let the chicken rest 10–15 minutes at room temperature.
Pro Tip: Surface moisture creates steam during cooking – and steam is the enemy of crispiness. Patting dry is a small step with a big payoff.
Step 3: Preheat the Air Fryer
- Set the air fryer to 375°F (190°C).
- Preheat for 3 minutes before adding any food.
- A cold basket slows cooking down, giving moisture more time to escape. Preheating eliminates this problem entirely.
Step 4: Cook and Flip
- Place chicken in a single layer with no overlap.
- Cook at 375°F for 7 minutes on the first side.
- Flip using tongs.
- Cook another 5–7 minutes until the exterior is golden.
What affects your exact cook time:
- Chicken thickness (thicker = longer)
- Air fryer brand (some run 10–15°F hotter than rated)
- Starting temperature (fridge-cold vs. room temp)
Step 5: Check Internal Temperature
- Insert a thermometer into the thickest part of the breast.
- Target: 165°F (74°C) per USDA food safety guidelines.
- For juicier results: Pull at 160°F and let carryover cooking finish the job during the rest.
A $10 instant-read thermometer is the single best investment you can make in your cooking. It completely eliminates the guesswork that causes overcooked, dry chicken.
Step 6: Rest, Then Slice
- Transfer to a cutting board and rest for 5 full minutes.
- During rest, muscle fibers relax and reabsorb their juices.
- Cutting early sends all that moisture running onto the board instead of staying in the meat.

Popular Seasoning Variations
Once you’ve nailed the base recipe, try these proven flavor combinations:
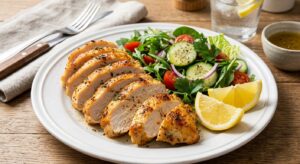
- Italian Herb – Swap smoked paprika for Italian seasoning; finish with a squeeze of fresh lemon juice after cooking.
- Lemon Pepper – Use lemon pepper as your primary spice; serve with a lemon wedge on the side.
- Honey Garlic Glaze – Brush a mix of 1 tbsp honey + 1 tsp soy sauce + 1 tsp minced garlic onto the chicken in the last 3 minutes of cooking.
- Buffalo-Style – Toss cooked chicken in hot sauce + 1 tsp melted butter. Perfect for salads and wraps.
- Mediterranean – Season with cumin, coriander, and turmeric; serve with tzatziki and warm pita.
6 Mistakes That Ruin Air Fryer Chicken Breast
Avoid these and you’ll be ahead of most home cooks:
- Skipping the pound step – Uneven thickness guarantees uneven cooking. Always pound first.
- Not preheating – A cold basket leads to longer cook times and drier results.
- Overcrowding the basket – Air must flow freely. Cook in batches if needed; never stack or overlap.
- Cooking frozen without adjusting – Add ~50% more time (20–25 min at 360°F) and always verify temperature.
- Cutting without resting – Even 5 minutes makes a visible, significant difference in juiciness.
- Trusting time over temperature – Air fryers vary by brand. The thermometer is the only reliable source of truth.
What to Serve With Air Fryer Chicken Breast
This protein is endlessly versatile. Here are the best pairings by meal type:
Quick Weeknight Meals:
- Air-fried broccoli or asparagus + steamed rice
- Sliced over a store-bought Caesar salad
- Tucked into a warm whole-wheat wrap with hummus and spinach
Meal Prep Bowls:
- Brown rice + roasted sweet potato + sliced chicken + avocado + tahini
- Quinoa + cherry tomatoes + cucumber + feta + olive oil
Pasta Dishes:
- Sliced over pesto linguine with parmesan
- Diced into a creamy garlic pasta for a quick, high-protein dinner
Storage, Reheating, and Meal Prep Tips
Air fryer chicken breast is a meal-prepper’s dream. Here’s how to manage it:
Refrigerator:
- Store in an airtight container for up to 4 days
- Keep whole when possible – sliced chicken loses moisture faster
Freezer:
- Freeze individual portions in zip-lock bags for up to 3 months
- Label with the date and seasoning used; thaw overnight in the fridge
Reheating the Right Way:
- Air fryer at 350°F for 3–4 minutes – restores the crispy exterior perfectly
- Oven at 300°F for 8–10 minutes covered with foil to retain moisture
- Avoid the microwave – steam makes the texture rubbery and soft
Batch Cooking:
- Season 4–6 breasts at once; cook in two separate batches
- Cool completely before storing to prevent condensation
- Use throughout the week in salads, wraps, bowls, and pasta
Frequently Asked Questions
Q1: What temperature should I cook chicken breast in the air fryer?
Cook air fryer chicken breast at 375°F (190°C). This temperature creates a lightly crisp exterior while keeping the interior moist. Always verify doneness with a thermometer – the internal temperature must reach 165°F (74°C).
Q2: How long does it take to cook chicken breast in an air fryer?
A boneless, skinless chicken breast (6–8 oz, pounded to ¾-inch thickness) takes approximately 14–16 minutes total at 375°F – roughly 7 minutes per side. Thicker or larger breasts may require 18–20 minutes. Always confirm with a thermometer.
Q3: Can I cook frozen chicken breast in the air fryer?
Yes. Cook frozen chicken breast at 360°F for 20–25 minutes, flipping halfway through. Always confirm the internal temperature reaches 165°F. Thawed chicken produces slightly better texture, but frozen works well in a pinch.
Q4: Do I need to flip chicken breast in the air fryer?
Yes – flipping halfway through is recommended. Most air fryers circulate heat primarily from the top, so flipping ensures an even, golden crust on both sides and more uniform cooking throughout.
Q5: Why is my air fryer chicken breast dry?
The most common causes are:
- Not pounding to even thickness (thin edges overcook first)
- Cooking past 165°F internal temperature
- Cutting the chicken before resting
- Not preheating the air fryer
A meat thermometer and a 5-minute rest solve most dryness issues immediately.
Q6: Should I marinate chicken before air frying?
Marinating is optional but highly beneficial. Even a 15-minute marinade in olive oil, lemon juice, and garlic noticeably improves moisture and flavor. For best results, marinate 2–4 hours in the refrigerator. Avoid heavy sugar marinades – they burn quickly in the high heat of the air fryer.
Q7: Can I cook chicken breast in the air fryer without oil?
Technically yes, but not recommended. A light coating of oil (1 teaspoon) helps spices adhere, promotes browning via the Maillard reaction, and prevents sticking. Without it, the exterior tends to be pale and less textured. One teaspoon adds only ~40 calories and makes a significant difference.
Q8: What is the best thickness for air fryer chicken breast?
The ideal thickness is ¾ inch (approximately 2 cm). At this thickness, the interior reaches a safe temperature before the exterior overcooks. If your breast is thicker, pound it down or butterfly it. For thinner cutlets or chicken tenders, reduce total cook time to 8–10 minutes.
The three non-negotiable principles of great air fryer chicken breast: even thickness, the right temperature, and adequate rest time. Master these, and you’ll produce perfectly juicy, golden chicken breast in under 20 minutes – every single time.


1 Comment
[…] common takeout-wing mistake is sauce that’s so heavy it turns crispy skin soggy within minutes. Restaurants do this because sauce-coated wings look generous in photos. You don’t have that […]