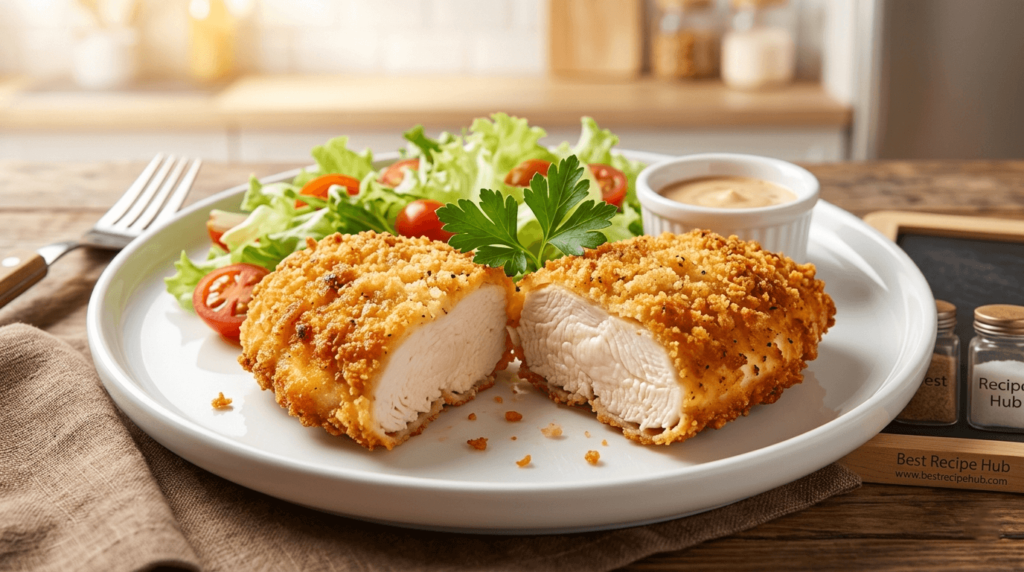
Dry, rubbery, chalky air fryer chicken is the single most common complaint about these machines — and it's also the easiest problem in the kitchen to fix permanently. Nothing is wrong with your air fryer. What's wrong is the assumption that chicken cooks the same way in a 1,500-watt convection basket as it does in a conventional oven.
An air fryer moves hot air across the surface of your food at high speed. That airflow is exactly what gives you crackling skin and browned edges — and it's also what strips moisture off a naked chicken breast in about eight minutes flat. Once you learn to manage moisture before cooking and time during cooking, juicy chicken stops being luck and becomes repeatable.
This guide covers the physics behind the problem, prep steps that actually matter, a tested temperature-and-time chart for every cut, a master recipe you can flavor a dozen ways, troubleshooting for the specific ways chicken goes wrong, and safe-handling guidance you can rely on.
Why Air Fryer Chicken Turns Out Dry
Chicken breast is roughly 75% water and almost fat-free. Its muscle proteins begin to contract meaningfully around 140°F (60°C) and squeeze out moisture progressively as the temperature climbs. By 175°F, a breast has lost a large share of its juice and the texture turns fibrous and dry.
An air fryer accelerates that process in three ways:
- Fast convection. Moving air transfers heat far more efficiently than still air, so the surface dehydrates and the interior climbs faster than most people expect.
- A tiny cooking chamber. Small volume means big swings. Adding cold chicken drops the temperature; the machine then over-corrects and blasts heat.
- No steam buffer. A covered dish or a crowded roasting pan traps humidity. An air fryer vents it, so there's nothing slowing evaporation at the surface.
The three practical culprits behind dry results are almost always the same:
- Overcooking. Two to three extra minutes is genuinely enough to take a breast from juicy to sawdust.
- No salt step. Unsalted chicken has no help retaining water once the proteins tighten.
- Uneven thickness. A tapered breast means the thin end is at 180°F while the thick end is still at 150°F.
Fix moisture before cooking, and control time and temperature during cooking. That's the whole method.
Know Your Machine First
Air fryers are not standardized. Two models set to 375°F can behave 25°F apart, and that variance explains most of the "I followed the recipe and it was dry" reports.
| Type | How it behaves | What to adjust |
|---|---|---|
| Basket (drawer) style | Most aggressive airflow, hottest and fastest | Check 3–4 minutes early on your first cook |
| Oven / toaster-oven style | Larger chamber, gentler airflow, more even | May need 2–5 extra minutes |
| Dual-basket | Two smaller zones; each runs hot | Halve batch sizes, don't stack |
| Lid-style (pressure cooker attachment) | Weakest convection | Add 3–6 minutes, expect less browning |
Two habits worth building on any model:
- Run a calibration cook. The first time you make chicken, note the exact minute it hit temperature. Every future cook becomes a repeat of that number instead of a guess.
- Respect the max-fill line. Overcrowding is the fastest way to steam chicken instead of roasting it — pieces should never overlap, and you want visible gaps for air to move through.
If your machine is new and you're still building a rotation of dishes, this same airflow logic applies across other quick basket dinners as well — small batches, preheat, thermometer.
The Prep Steps That Guarantee Juicy Chicken
1. Dry Brine (The Highest-Impact 30 Minutes)
If you only add one step, add this one. Salt dissolves some muscle proteins and helps the meat hold onto water during cooking — chicken that has been salted ahead loses noticeably less moisture than chicken salted at the last second.
- Ratio: ¾ teaspoon fine sea salt (or 1¼ teaspoons kosher) per pound of chicken
- Time: 30 minutes minimum on the counter; 4–24 hours uncovered in the fridge is better
- Bonus: uncovered fridge time dries the surface, which browns dramatically better
A wet brine (¼ cup salt per quart of water, 30–60 minutes) works too and is more forgiving for very lean cuts, but it leaves the surface wet and blunts crisping. In practice, dry brining wins for air frying.
2. Pat Dry, Then Oil Lightly
Surface water has to evaporate before browning can begin, and every second spent evaporating is a second spent overcooking the interior. Blot each piece with paper towels until it feels tacky, not slick.
Then add a thin film of fat — about 1 tablespoon of oil per 1–2 pounds. Oil conducts heat into the surface, carries fat-soluble spice flavors, and slows moisture loss. Use a high-smoke-point oil: avocado, refined canola, light olive, or ghee. Skip aerosol cooking sprays with propellants, which can craze the non-stick coating on baskets over time.
3. Even Out the Thickness
Uneven chicken breast is the number-one cause of the "dry edges, pink center" combination.
- Place the breast between two sheets of parchment or plastic wrap
- Pound the thick end down with a mallet, small skillet, or rolling pin
- Target a uniform ¾ inch (2 cm)
- Alternative: slice the breast horizontally into two thin cutlets and cook 8–10 minutes total
4. Take the Chill Off
Ten to fifteen minutes on the counter narrows the gap between surface and center temperature, so the outside doesn't have to overcook while the middle catches up. Don't go beyond about 30 minutes at room temperature.
5. Always Preheat
Three to five minutes of preheating gives you an immediate surface sear. Placing chicken in a cold basket means several minutes of low-temperature hanging around — the exact condition that produces rubbery, pale, slightly bouncy meat.
Air Fryer Chicken Time and Temperature Chart
Times assume a preheated basket-style air fryer and a single, uncrowded layer. Always finish by thermometer, not by clock.
| Cut | Temp | Time | Flip? | Pull temp |
|---|---|---|---|---|
| Boneless breast (¾", pounded) | 375°F / 190°C | 16–18 min | Yes, at 10 min | 165°F |
| Thin cutlets (½") | 400°F / 205°C | 8–10 min | Yes, at 5 min | 165°F |
| Boneless thighs | 380°F / 193°C | 15–18 min | Yes, halfway | 175–185°F |
| Bone-in, skin-on thighs | 380°F / 193°C | 22–26 min | No | 175–185°F |
| Drumsticks | 390°F / 199°C | 20–24 min | Yes, at 12 min | 175–185°F |
| Wings (fresh) | 380°F, then 400°F | 18 min + 5–7 min | Turn twice | 175–185°F |
| Breaded tenders | 400°F / 205°C | 10–12 min | Yes, halfway | 165°F |
| Frozen breast (unbreaded) | 360°F / 182°C | 18–22 min | Yes, halfway | 165°F |
| Whole chicken (3.5–4 lb) | 350°F / 177°C | 50–60 min | Breast-side up last 20 min | 165°F breast / 175°F thigh |
Two notes that matter more than the numbers themselves:
- Dark meat is different. Thighs and drumsticks contain connective tissue that needs heat to break down. Taking them to 175–185°F makes them more tender, not less — the opposite of breast meat.
- Carryover is real. Expect 3–5°F of additional rise while the chicken rests, so plan around it rather than being surprised by it.
Master Recipe: Juicy Air Fryer Chicken Breast
This is the base recipe worth memorizing. Everything else is a seasoning swap.
Serves 2 · Prep 10 min (plus 30 min dry brine) · Cook 18 min
Ingredients
- 2 boneless, skinless chicken breasts (6–8 oz each), pounded to ¾ inch
- 1½ teaspoons kosher salt (dry brine)
- 1 tablespoon avocado or olive oil
- 1 teaspoon garlic powder
- 1 teaspoon smoked paprika
- ½ teaspoon onion powder
- ½ teaspoon freshly ground black pepper
Method
- Dry brine. Pat the breasts dry, sprinkle the salt evenly over all surfaces, and rest 30 minutes at room temperature (or refrigerate uncovered up to 24 hours).
- Preheat the air fryer to 375°F (190°C) for 4 minutes.
- Season. Blot any surface moisture, rub with oil, then coat with the garlic powder, paprika, onion powder, and pepper. Don't add more salt.
- Arrange the breasts in a single layer with at least ½ inch between them and the basket walls.
- Cook 10 minutes, then flip.
- Cook 6–8 minutes more. Start probing the thickest part at the 15-minute mark.
- Pull at 165°F (74°C).
- Rest 5–7 minutes, loosely tented, before slicing. Slice across the grain.
The rest is not optional. Cutting immediately dumps juice onto the board; five minutes lets the muscle fibers relax and reabsorb it. This is the single most-skipped step in every home kitchen.
If you want a fuller walk-through with more sauce ideas, our dedicated breast tutorial goes deeper on marinades and doneness cues.

The same base recipe with three finishes — smoked paprika rub, lemon-herb, and a honey-cayenne glaze brushed on after cooking.
Chicken Thighs: The Most Forgiving Cut
If dry chicken has burned you before, start with thighs. Their higher fat and collagen content give you a wide margin of error — a thigh held five extra minutes is still juicy, whereas a breast is ruined.
Bone-in, skin-on thighs (the best value in the whole cut list):
- Dry brine 30+ minutes; the skin benefits from overnight fridge time
- Pat the skin bone dry — no oil needed on the skin side, it renders its own
- Place skin-side up, spaced apart, in a 380°F preheated basket
- Cook 22–26 minutes without flipping
- Confirm 175–185°F at the thickest point, avoiding the bone
- Rest 5 minutes
Boneless thighs: 380°F for 15–18 minutes, flipping halfway. Trim the loose fat flaps first or they'll smoke.
A practical warning: rendering thigh fat drips into the drawer and can smoke. Add 1–2 tablespoons of water beneath the basket (never on the crisper plate itself) to stop the drippings from scorching. Cooks who prefer the oven for this cut can compare notes with these slow-roasted thigh dinners, which trade speed for hands-off convenience.
Tenders, Wings, and Drumsticks
Breaded Tenders That Stay Tender
- Dry brine the tenders 20 minutes; pat dry
- Dredge in seasoned flour, then beaten egg, then panko mixed with paprika, garlic powder, and salt
- Press the coating on firmly and spray or mist both sides with oil — dry panko stays pale and chalky
- Cook at 400°F for 10–12 minutes, flipping at 6 minutes
- Pull at 165°F
The high heat sets a crust fast, which shields the interior. A common mistake is skipping the flour layer — the egg then slides off and the breading falls into the basket.
Wings
Wings need two stages. Cook at 380°F for 18 minutes, turning twice, then crank to 400°F for a final 5–7 minutes to blister the skin. Toss ½ teaspoon of baking powder (not soda) per pound into the dry seasoning to raise the skin's pH and improve browning. Sauce only after cooking — sugar-based sauces burn in the airflow.
Drumsticks
390°F for 20–24 minutes, turning once at the 12-minute mark. Score the thickest part of the meat lightly if your drumsticks are large; it helps heat reach the bone without overcooking the exterior.
Cooking Frozen Chicken in the Air Fryer
This works, and it's one of the genuinely useful things an air fryer does better than an oven.
- Knock off frost and ice crystals — surface ice becomes steam and kills crisping
- Place frozen breasts directly in a 360°F preheated basket
- Cook 18–22 minutes, flipping and separating pieces at the halfway point
- Season at the 10-minute mark, once the surface has thawed enough for spices to stick
- Verify 165°F at the thickest point; frozen pieces vary wildly in size
Two honest trade-offs: you can't brine frozen chicken, so it won't be as juicy as thawed-and-brined, and thick pieces over 8 ounces are prone to a cool center. Never air fry chicken that's frozen in a solid block — separate the pieces first.
Food Safety and the Thermometer Rule
An instant-read thermometer costs less than two packs of chicken and eliminates guessing entirely. Visual cues are unreliable: air-fried chicken often stays slightly pink near the bone even when fully cooked, and a browned exterior tells you nothing about the center.
Guidance to follow:
- 165°F (74°C) is the recommended safe minimum internal temperature for all poultry, measured at the thickest part away from bone. The USDA's Food Safety and Inspection Service maintains the current temperature guidance, and general handling advice is published at FoodSafety.gov.
- Insert the probe horizontally into the side of a breast for the most accurate reading in thin cuts.
- Take two or three readings on larger pieces; hot and cold spots are normal in a small chamber.
- Don't rinse raw chicken — it spreads bacteria around the sink rather than removing it.
- Refrigerate leftovers within two hours, in shallow containers so they cool quickly.
- Use a separate cutting board for raw poultry, and wash hands, board, and thermometer probe after contact.
You'll see chefs pull breasts at 158–162°F and rely on carryover plus rest time, because pasteurization is a function of both temperature and time held. It's a legitimate technique, but it depends on an accurate, fast thermometer and careful handling. If you're cooking for children, older adults, pregnant people, or anyone immunocompromised, stay with the 165°F standard.
Troubleshooting: Match the Symptom to the Cause
| What went wrong | Most likely cause | Fix next time |
|---|---|---|
| Dry, stringy breast | Cooked past ~170°F | Probe at 15 min; pull at 165°F |
| Rubbery, bouncy texture | Too low a temp for too long, or no preheat | Preheat fully; use 375°F+ |
| Pale, no browning | Wet surface, no oil, crowded basket | Blot dry, thin oil film, cook in batches |
| Burnt outside, raw inside | Temp too high for the thickness | Drop 25°F and extend time |
| Breading fell off | No flour layer, coating not pressed on | Flour → egg → panko, press firmly |
| Heavy smoking | Fat dripping onto the hot element | Water in the drawer; trim excess fat |
| Uneven doneness | Tapered pieces or overlapping | Pound to even thickness; single layer |
| Sauce turned black | Sugary glaze added too early | Brush on in the last 2 minutes or after |
Flavor Variations Using the Same Method
The cooking process never changes — only the seasoning does. Each of these works on breasts, thighs, or tenders.
- Lemon herb: lemon zest, thyme, rosemary, garlic, olive oil. Add lemon juice after cooking so it doesn't steam the surface.
- Spicy honey: smoked paprika and cayenne in the rub; brush with honey mixed with a splash of vinegar in the final 2 minutes.
- Parmesan Italian: dried oregano, basil, garlic powder, and finely grated Parmesan pressed on for the last 4 minutes.
- Soy-ginger: marinate 30 minutes in soy sauce, grated ginger, garlic, and sesame oil — then pat dry thoroughly, or the sugars in the soy will smoke.
- Chipotle lime: chipotle powder, cumin, coriander, lime zest; finish with crumbled cotija.
- Jerk-style: allspice, thyme, scotch bonnet, brown sugar; keep the temp at 360°F so the sugar doesn't scorch.
For a completely different weeknight direction, the same rub logic carries over nicely to warm-spiced tagine flavors — cumin, cinnamon, and preserved lemon are excellent on air fryer thighs.
What to Serve Alongside
The most efficient way to use an air fryer is to cook the protein first, tent it while it rests, then run the vegetables in the still-hot basket — resting time and cooking time overlap perfectly.
- Same-basket sides: broccoli florets, halved Brussels sprouts, or baby potatoes take 10–14 minutes at 380°F. Our guide to crisp-edged vegetable sides breaks the timings down by type.
- Stovetop pairing: a one-pan noodle base cooks in the same window and needs almost no attention.
- Fresh and light: shaved fennel and citrus, or a big chopped salad with the sliced chicken laid on top.
- Meal prep: slice cooled breast for grain bowls and wraps — plenty of other boneless breast ideas work well cooked once and used across three days.
Rotating proteins keeps the routine from going stale. A fast fish option takes under 10 minutes in the same basket, and minced poultry dinners cover the nights when you want meatballs or patties instead of whole cuts.
Storage, Reheating, and Meal Prep
Reheating is where most meal-prepped chicken dies. A microwave drives moisture out fast; the air fryer, used gently, does not.
- Refrigerate: airtight, up to 3–4 days. Store pieces whole and slice on the day you eat them — sliced chicken dries out roughly twice as fast.
- Freeze: wrap tightly, up to 3 months. Thaw overnight in the fridge, never on the counter.
- Reheat in the air fryer: 325–350°F for 3–5 minutes. Mist lightly with water or broth first, or lay a damp paper towel over the pieces for the first minute.
- Add sauce before reheating rather than after; it insulates the surface.
- Batch smart: cook two staggered batches instead of one crowded one. Crowding costs more time than a second round does.
Air Fryer Care That Affects Cooking Quality
Performance degrades quietly. A greasy basket smokes, a filmed heating element radiates less heat, and a blocked vent kills airflow — all of which change your cook times.
- Wash the basket and crisper plate after every chicken cook; rendered fat polymerizes into a sticky varnish if left.
- Wipe the heating element with a damp cloth once the unit is fully cool and unplugged.
- Never use metal scourers or abrasive powders on non-stick surfaces.
- Keep 4–5 inches of clearance behind and above the unit so hot exhaust isn't recirculated.
- Check the manufacturer's manual for your specific model's max-fill line and dishwasher-safe parts — these genuinely differ between brands.
Common Mistakes Worth Naming
- Trusting the clock over the thermometer. Every model, every piece of chicken, every starting temperature is different.
- Salting at the last second. Thirty minutes earlier costs nothing and changes the result.
- Crowding the basket to save one round of cooking.
- Skipping the rest. Five minutes of patience protects everything the previous twenty minutes built.
- Cooking breasts and thighs together to the same target. They want different finishing temperatures.
- Adding sweet sauces at the start and then blaming the machine for burning them.
- Not blotting marinated chicken, which steams instead of browning and smokes from residual sugars.
Frequently Asked Questions
What temperature should I use for air fryer chicken breast? 375°F (190°C). Cook 10 minutes, flip, then 6–8 minutes more until the thickest part reads 165°F. Thin cutlets under ½ inch do better at 400°F for 8–10 minutes.
How do I stop chicken from drying out in an air fryer? Dry brine with salt at least 30 minutes ahead, pound to an even ¾ inch, apply a thin film of oil, preheat the basket, pull at 165°F rather than "a few minutes longer to be safe," and rest for 5 minutes before slicing.
Can I cook frozen chicken in an air fryer? Yes. Cook frozen breasts at 360°F for 18–22 minutes, flipping halfway, and season around the 10-minute mark once the surface has thawed. Always verify 165°F internally, since frozen pieces cook unevenly.
How long do chicken thighs take? Bone-in, skin-on thighs need 22–26 minutes at 380°F with no flipping. Boneless thighs take 15–18 minutes with one flip. Cook dark meat to 175–185°F for the most tender texture.
Do I really need to preheat? Yes, 3–5 minutes. A cold start means several minutes of low-temperature cooking, which is the main cause of rubbery, pale chicken.
Why is my air fryer chicken rubbery? Usually a low temperature held too long, no preheat, or an overcrowded basket that steamed the meat. Raise the temperature, cook in a single layer, and probe early.
Should I use parchment liners? Only perforated liners, only once food is in place to weigh them down, and never during preheat — a loose liner can hit the heating element. Liners also reduce airflow to the bottom of the food, so expect slightly less crisping.
Can I use a marinade instead of a dry brine? Yes, especially yogurt or buttermilk marinades, which tenderize and taste excellent. Just pat the surface dry before cooking or the marinade will steam and smoke rather than brown.
Is air fryer chicken healthier than fried chicken? It uses dramatically less oil — a tablespoon versus a quart — so it's much lower in added fat than deep frying, while producing a similar crisp exterior. It's comparable to oven roasting in nutritional terms.
How much chicken fits in my air fryer? As a rough guide, roughly 1 pound per 3 quarts of basket capacity, arranged in a single layer with visible gaps. If pieces touch, cook in batches.
Conclusion
Juicy air fryer chicken comes down to four controllable things: salt it early, make it an even thickness, preheat the basket, and pull it at the right internal temperature. Everything else — the rub, the sauce, the cut — is preference. The thermometer is what turns a good recipe into a reliable one, because it replaces guesswork with a number that doesn't lie.
Your next step: make the master breast recipe tonight exactly as written, and write down the minute your machine hit 165°F. That single number, specific to your air fryer, is the calibration that makes every future chicken dinner repeatable.
Ready to build a full week of fast dinners around it? Explore our full recipe archive for tested mains, sides, and meal-prep ideas that pair with a single batch of air fryer chicken.


