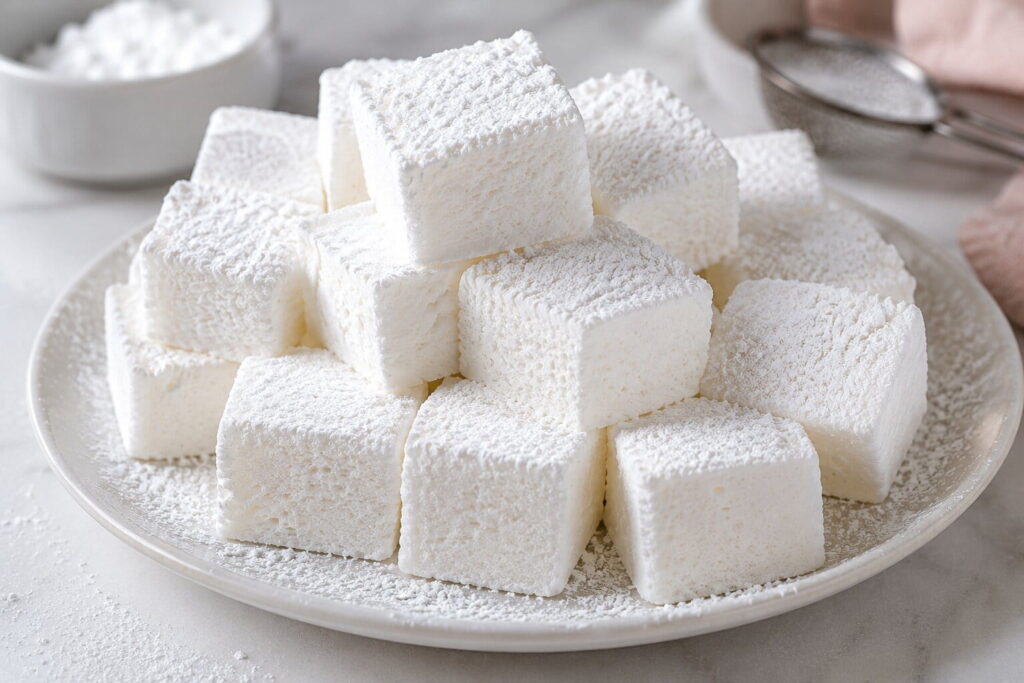
Homemade marshmallows are nothing like the bagged versions you’ve been settling for. They’re impossibly soft, pillowy, and melt on your tongue with a clean vanilla finish. The process requires a candy thermometer and a bit of patience, but the payoff is a batch of confectioner’s gold that elevates hot cocoa, s’mores, and dessert tables for weeks. This guide walks you through every detail—from the science of sugar syrups to troubleshooting sticky messes—so you nail it on your first try.
Why Make Marshmallows at Home?
Store‑bought marshmallows are engineered for shelf stability, not taste. Manufacturers add preservatives, artificial flavoring, and stabilizers to keep them shelf‑ready for a year. Homemade marshmallows solve all of that with just six recognizable ingredients. You can also read our guide on burnt ends recipe.
- Real flavor – Pure vanilla extract instead of artificial vanillin.
- Superior texture – Tender and airy rather than dense and rubbery.
- Full control – Adjust sweetness, add‑ins, or allergens to suit your needs.
- Cost‑effective – A homemade batch costs less per ounce than premium brands, especially when you buy gelatin in bulk.
- Gift‑worthy – Wrap squares in cellophane with a ribbon and they become instant holiday favours.
In practice, nothing converts a marshmallow skeptic faster than handing them a still‑slightly‑warm homemade one. The texture alone is a revelation.
A Brief History and the Science Behind a Great Marshmallow
The name “marshmallow” comes from the marsh mallow plant (Althaea officinalis), a wetland herb whose root sap was mixed with honey by ancient Egyptians as a royal delicacy. By the 19th century, French confectioners whipped the sap with sugar and egg whites into pâte de guimauve. As demand grew, manufacturers replaced the costly mallow root with gelatin—which set faster and allowed mass production. That shift is why modern marshmallows, homemade or not, contain no actual marsh mallow plant at all. You can also read our guide on fig jam recipe.
Understanding the science behind the recipe makes you far less likely to make mistakes. A marshmallow is a stabilized sugar foam built from three components:
- Gelatin – Provides the protein network that traps air bubbles and gives marshmallows their signature chew.
- Whipped air – Creates light volume. Whip time is non‑negotiable; under‑whipping leads to dense, deflated squares.
- Hot sugar syrup – Cooked to 240°F (115°C), the syrup stabilizes the mixture and prevents microbial growth, while sweetening and thickening the foam.
When you pour hot syrup into bloomed gelatin, you’re essentially cooking an egg‑white‑style foam without the eggs. The heat sets the gelatin’s proteins just enough to lock in the air you’ve whipped in. That’s why the final product holds its shape instead of collapsing back into syrup.
Why Temperature Precision Matters
Candy‑making is applied chemistry. For marshmallows, the temperature window is forgiving once you know the logic:
| Syrup Temperature | Result | Best Use |
|---|---|---|
| Below 234°F (112°C) | Too much water – marshmallows won’t set | Avoid |
| 234–240°F (112–115°C) | Ideal soft‑ball stage – classic pillowy texture | Target |
| 240–250°F (115–121°C) | Firmer, chewier texture (closer to nougat) | Optional for firm marshmallows |
| Above 250°F (121°C) | Caramelizes and hardens; unusable for marshmallows | Avoid |
A reliable candy thermometer removes nearly all guesswork. Test its accuracy by placing it in boiling water (should read 212°F / 100°C at sea level). If it’s off by more than 2°F, adjust your target accordingly or replace it. You can also read our guide on easy cuban recipes at home.
Altitude adjustment: For every 1,000 feet above sea level, subtract 2°F from the target temperature. At 5,000 feet, aim for 230°F instead of 240°F.
Ingredients and Equipment – What You Need
Ingredients
| Ingredient | Amount | Role |
|---|---|---|
| Unflavored gelatin (powdered) | 3 packets (about 2½ tablespoons / 21 g) | Structure and chew |
| Granulated sugar | 2 cups (400 g) | Sweetness and body |
| Light corn syrup | ⅔ cup (160 ml), divided | Prevents crystallization, keeps texture smooth |
| Water | 1 cup (240 ml), divided | For blooming and syrup |
| Salt | ¼ teaspoon | Balances sweetness |
| Pure vanilla extract | 1 tablespoon | Flavor backbone |
| Powdered sugar + cornstarch | About ½ cup (60 g) combined, for dusting | Prevents sticking |
Equipment
- Stand mixer with whisk attachment (hand mixer works but takes twice as long)
- Candy thermometer
- 9×13‑inch (23×33 cm) baking pan
- Offset spatula or well‑greased hands for spreading
- Sharp knife or pizza cutter for clean cuts
Pro tip: Grease your pan and every tool that will touch the marshmallow mixture with a neutral oil or nonstick spray. Marshmallow is essentially edible glue before it fully sets—generous greasing saves you from a sticky cleanup nightmare. For further reading, see nchfp.uga.edu.
Step‑by‑Step Instructions – From Bloom to Cut
Bloom the gelatin. Pour ½ cup (120 ml) of cold water into the bowl of your stand mixer. Sprinkle the gelatin evenly over the surface. Let it sit undisturbed for 10 minutes. The granules will soften and absorb water, ensuring they dissolve smoothly later.
Cook the sugar syrup. In a medium saucepan, combine the remaining ½ cup (120 ml) water, granulated sugar, corn syrup, and salt. Cook over medium heat, stirring only until the sugar dissolves. Once the mixture is clear, stop stirring completely — stirring after boiling can cause sugar crystals to form and make your marshmallows grainy.
Reach the target temperature. Clip your candy thermometer to the saucepan (bulb not touching the bottom). Bring the syrup to a boil and let it cook undisturbed until it reaches 240°F (115°C). This typically takes 8–12 minutes. Do not walk away — the temperature can jump quickly.
Combine syrup with gelatin. With the mixer on low speed, slowly pour the hot syrup down the side of the bowl into the bloomed gelatin. Avoid hitting the whisk to prevent splatter. Once all syrup is added, increase speed to high.
Whip until tripled. Whip on high for 10–12 minutes. The mixture will progress through three visual stages:
- Thin, cloudy liquid (first 2–3 minutes)
- Opaque, glossy fluff (minutes 4–7)
- Stiff, cloud‑like peaks that hold their shape on the whisk (minutes 10–12)
Add vanilla. During the last minute of whipping, drizzle in the vanilla extract. Keep mixing until fully incorporated.
Pour and spread. Working quickly, scrape the mixture into your prepared pan. Use a greased offset spatula or your greased fingers to smooth the top evenly. The mixture will be very sticky — that’s normal.
Let it set. Leave the pan uncovered at room temperature for at least 4 hours, though overnight is best. Cutting too early results in a gooey, unmanageable mess.
Cut and dust. Mix the powdered sugar and cornstarch together in a shallow bowl. Dust your work surface and a sharp knife or pizza cutter with the mixture. Turn the marshmallow block out, cut into squares, then toss each piece in the remaining dusting mixture until all sticky edges are coated.
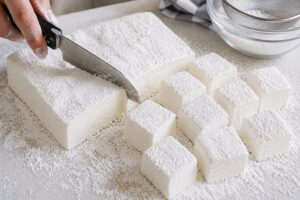
Freshly cut marshmallows ready for the final dusting — the goal is a soft, non‑sticky surface.
Troubleshooting: What Went Wrong and How to Fix It
| Problem | Likely Cause | Fix |
|---|---|---|
| Too sticky | Not dusted thoroughly, or cut before fully set | Toss again in more powdered sugar‑cornstarch mix; extend setting time next batch. |
| Too dense or rubbery | Undercooked syrup or insufficient whipping | Verify thermometer accuracy; whip a full 12 minutes. |
| Won’t set | Too little gelatin, or gelatin wasn’t bloomed properly | Measure gelatin precisely; always give it the full 10‑minute bloom. |
| Grainy texture | Sugar crystals formed during cooking | Avoid stirring once syrup boils; brush saucepan walls with a wet pastry brush. |
| Marshmallows deflate after a day | Under‑whipped mixture; pan not left uncovered to set | Whip until stiff, glossy peaks form; always set pan uncovered so moisture escapes. |
| Flat taste | Imitation vanilla, expired gelatin, or skipping salt | Use pure vanilla extract; check gelatin expiration; always include the salt. |
Beyond Vanilla: Flavor and Color Variations
Once you’ve mastered the base, experimenting is irresistible. For each variation, add the flavoring during the last minute of whipping (except dried additions, which you fold in by hand after pouring).
- Peppermint – Replace vanilla with 1½ teaspoons peppermint extract. Fold in ½ cup crushed candy canes after pouring.
- Toasted coconut – Roll finished marshmallows in toasted unsweetened coconut flakes instead of dusting mix.
- Chocolate swirl – Drizzle ¼ cup melted dark chocolate over the mixture in the pan; use a knife to create swirls before it sets.
- Brown butter – Whisk 2 tablespoons browned butter (cooled to room temperature) into the mixture along with the vanilla.
- Citrus – Add 1 tablespoon finely grated orange or lemon zest with the vanilla.
- Maple – Replace half the corn syrup (⅓ cup) with real maple syrup. Reduce sugar by 2 tablespoons to account for sweetness.
- Strawberry – Fold in 3 tablespoons freeze‑dried strawberry powder (ground from whole berries) during the last minute of whipping.
- Coffee – Dissolve 1½ teaspoons instant espresso powder in 1 tablespoon hot water and add with the vanilla.
Creative Ways to Use Homemade Marshmallows
These aren’t just for hot cocoa — though they absolutely transform a simple mug of chocolate.
- S’mores – Toast them over a campfire or kitchen torch; homemade marshmallows brown beautifully and develop a caramelized crust.
- Rice cereal treats – Swap store‑bought mini marshmallows for chopped homemade ones for a richer, less sweet bar.
- Fudge and brownies – Fold 1‑inch cubes into brownie batter or chocolate fudge before baking for pockets of gooey sweetness.
- Dessert skewers – Dip marshmallows in melted chocolate and sprinkles, then thread onto skewers for party treats.
- Gifts – Layer marshmallows in mason jars with a cocoa mix packet and a handwritten tag. They’re a highlight of our no‑bake desserts collection.
For gifting, let marshmallows set completely before packaging. Use parchment paper between layers to prevent sticking. If shipping in humid weather, add a small moisture‑absorbent packet (silica‑gel‑free). Label with a “best by” date of 2–3 weeks out.
Homemade vs. Store‑Bought: A Side‑by‑Side Comparison
| Aspect | Homemade | Store‑Bought |
|---|---|---|
| Ingredients | 6 recognizable items | Often includes tetrasodium pyrophosphate, artificial flavors, dyes |
| Texture | Tender, melt‑in‑mouth | Firmer, denser (for transport) |
| Freshness | Best within 2–3 weeks | Shelf‑stable for a year+ (preservatives) |
| Portion size | Customizable, any shape | Standardized cylinder or mini |
| Cost per ounce | About $0.15–$0.25 | $0.30–$0.60 for premium brands |
Nutritional Considerations and Substitutions
One homemade marshmallow (about 1.5‑inch square) contains roughly 20–25 calories, 5–6 grams of sugar, and no fat. The gelatin provides a small amount of protein, though not enough to count as a meaningful source.
The base recipe is naturally gluten‑free and dairy‑free — making it a safe option for many common food sensitivities. For a vegetarian version, you can substitute agar‑agar, but the texture and setting process differ significantly (agar‑agar sets at room temperature faster and produces a firmer, less chewy result). If you try agar, use 2 teaspoons powder bloomed in ½ cup water, then bring to a boil before combining.
Common substitutions that work well:
- No corn syrup? Use light agave syrup or golden syrup in equal amounts. Texture will be slightly less smooth.
- No vanilla? Vanilla bean paste adds flecks and a more intense flavor.
- No granulated sugar? Superfine sugar dissolves slightly faster, but standard granulated works fine.
How to Store and Preserve Freshness
| Storage Method | Duration | Tips |
|---|---|---|
| Airtight container at room temperature | Up to 3 weeks | Layer with parchment; keep away from heat or direct sun. |
| Refrigerator | Not recommended | Cold dries marshmallows out quickly and speeds staling. |
| Freezer | Up to 2 months | Place in a well‑sealed freezer bag; thaw at room temperature 30 minutes before serving. Best enjoyed within the first week after thawing. |
If your marshmallows feel dry after a week, place a slice of fresh bread in the container overnight — it will release enough moisture to soften them again.
Expert Tips for First‑Time Makers
- Read the entire recipe before starting. Marshmallow‑making moves fast once the syrup hits temperature.
- Prep your pan and tools in advance. Grease everything before you turn on the burner.
- Don’t walk away from the boiling syrup. It can jump from 235°F to 250°F in under a minute.
- Use a stand mixer if possible. Twelve minutes of continuous high‑speed whipping is exhausting by hand.
- Weigh your gelatin. Packet sizes vary slightly between brands; 21 grams is the sweet spot.
- Humidity matters. On rainy days, add an extra hour to the setting time. In arid climates, check for doneness at 3 hours.
- Cut with a dusted pizza cutter. It glides through the block without tearing and gives clean, straight edges.
For more sweet treats you can make from scratch, take a look at our candied pecans recipe — another quick confection that makes a fantastic gift. And if you’re in the mood for a classic homemade dessert, try our banana bread recipe for a completely different kind of comfort.
Frequently Asked Questions
Q: How long do homemade marshmallows take to set?
They need at least 4 hours at room temperature, but letting them rest overnight gives the best texture and makes cutting much easier. Rushing this step is the most common reason first attempts disappoint.
Q: Can I make marshmallows without corn syrup?
Yes. Light agave syrup or golden syrup work as a 1:1 substitute. The texture will be slightly less smooth because these syrups contain more invert sugar, but the marshmallows will still set and taste great.
Q: Why are my homemade marshmallows not fluffy?
Two most likely culprits: the sugar syrup didn’t reach 240°F (too much water remains), or the mixture wasn’t whipped long enough to triple in volume. Check your thermometer and whip a full 12 minutes.
Q: Is gelatin necessary? Can I use a substitute?
Gelatin is the structural backbone of traditional marshmallows. Vegetarian versions can use agar‑agar, but the process differs: you must bring the agar mixture to a boil and it sets much faster, producing a firmer, less chewy marshmallow. If you go this route, see the substitutions section above for exact proportions.
Q: How do I keep homemade marshmallows from sticking together?
Toss cut marshmallows thoroughly in a 50/50 mix of powdered sugar and cornstarch. Store them layered with parchment paper in an airtight container at room temperature. If they still stick after a day, give them another dusting.
Q: Can homemade marshmallows be used for s’mores?
Absolutely. They toast beautifully over an open flame and develop a golden, caramelized crust with a soft, gooey centre. The richer vanilla flavor makes s’mores taste noticeably more luxurious.
Q: How long do homemade marshmallows last?
Properly stored in an airtight container at room temperature, they stay fresh for up to 3 weeks. They’re best within the first two weeks when the texture is softest. Freeze any you won’t eat within that window.
Q: Why did my marshmallow mixture deflate after whipping?
This usually happens when the syrup was added too slowly or at too low a temperature. The gelatin needs a hot, fast pour to properly aerate and stabilize the foam. Next time, pour the entire syrup stream in within 10–15 seconds while mixing on low.
Conclusion
Making marshmallows from scratch is one of the most rewarding kitchen projects you can try. The process teaches you fundamental candy‑making techniques while delivering a product that genuinely surprises everyone who tries it. Once you’ve tasted a homemade marshmallow — soft, fragrant, and perfectly sweet — you’ll find it hard to go back to the bagged version.
Your next step: pick a weekend when you have a couple of hours, gather your ingredients, and give the recipe a go. Start with the classic vanilla version, then explore the flavor variations. And once you’re done, browse our full collection of recipes for more from‑scratch inspiration — including our popular Mm cookie recipe for another crowd‑pleasing sweet you can make at home.


