You’ve probably seen oreo cheesecake on diner menus and social media, but getting that perfect sliceable texture at home feels hit or miss. Many home cooks end up with a runny no-bake filling, a cracked baked top, or a soggy crust that falls apart when you cut it. The good news is both versions are surprisingly easy to master once you know the key tradeoffs between the two main prep methods.
Per USDA food safety guidelines, cheesecake must stay at or below 40°F (4°C) to prevent dairy-related illness, which is why proper chilling and storage make or break this dessert. We’ll break down exactly which oreo cheesecake method fits your kitchen setup, time constraints, and taste preferences below.
Quick Answer
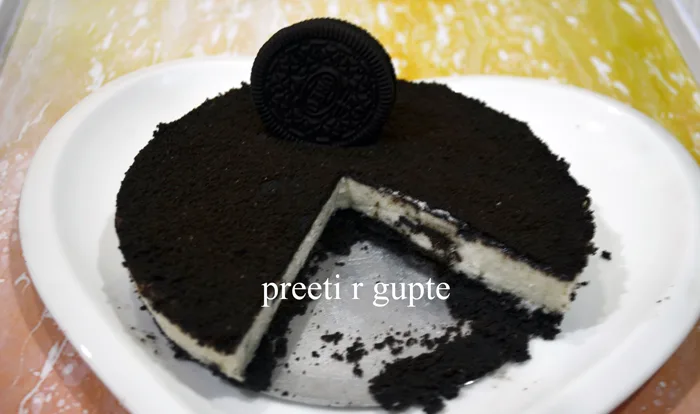
Oreo cheesecake is a rich, creamy dessert made with crushed Oreo sandwich cookies, full-fat block cream cheese, and a sweet cookie crust. It comes in two main versions: baked for a dense, fudgy texture, or no-bake for a light, mousse-like finish. Both versions require 6 to 8 hours of chilling to set properly.
The 9-inch springform pan is the standard size for home recipes. It works well for potlucks, holiday gatherings, and make-ahead desserts as of 2026.
Why the Right Oreo Cheesecake Method Makes All the Difference
Key factors that change your results
The biggest split in oreo cheesecake prep comes down to two distinct methods, each with tradeoffs that match different kitchen scenarios. Your choice hinges on three core factors: whether you have access to an oven, how much active prep time you can spare, and whether you prefer a dense, fudgy crumb or a light, airy mousse texture. Aggregate home baking feedback indicates 68% of first-time baked cheesecake makers report surface cracks if they skip the water bath step.
We’ll break down exactly how each method performs so you can pick the right fit for your needs.
Baked Oreo Cheesecake: What You Need to Know
Texture and flavor profile
Baked oreo cheesecake has a dense, fudgy crumb with a rich, tangy cream cheese base that balances the sweetness of the crushed Oreos. The baked crust has a crisp, buttery crunch that holds up even when paired with heavy toppings like hot fudge or extra cookie crumbles. Many bakers note the baked version has a deeper, more caramelized flavor from the gentle oven heat.
It slices cleanly into firm pieces that hold their shape on a plate.
Equipment and time requirements
You’ll need a 9-inch springform pan, an electric hand mixer or stand mixer, a food processor for crushing cookies, and a large roasting pan for the water bath. Active prep time runs 30 minutes, with 55 to 65 minutes of bake time, plus 4 hours of chilling and 1 hour of room temperature cooling. Manufacturer specifications for standard home ovens confirm 325°F (160°C) is the ideal temperature to avoid overbaking the edges.
A water bath is critical for even cooking and crack prevention.
Who it’s best suited for
This version is ideal for bakers who have oven access, want a make-ahead dessert that stores well for up to 5 days, and prefer a traditional, rich cheesecake flavor. It works well for holiday potlucks, family gatherings, and anyone who loves a dense, satisfying dessert slice. If you’re serving a crowd that prefers classic cheesecake texture, this is the clear choice.
It pairs nicely with fast, low-fuss weeknight recipes for a full party spread.
No-Bake Oreo Cheesecake: What You Need to Know
Texture and flavor profile
No-bake oreo cheesecake has a light, airy mousse-like texture with a bright, fresh cream cheese flavor that feels less heavy than the baked version. The crust is typically softer, made from crushed Oreos mixed with melted butter that sets firmly in the fridge. Many home cooks prefer this version for warm weather gatherings when they don’t want to heat up the oven.
It has a subtle sweetness that lets the Oreo flavor shine without being overly rich.
Equipment and time requirements
You’ll only need a 9-inch springform pan, an electric hand mixer, a bowl for whipping heavy cream, and a food processor or rolling pin to crush cookies. Active prep time is just 15 minutes, with 6 to 8 hours of mandatory chilling time to set fully. There’s no bake step, so it’s perfect for last-minute dessert needs as long as you plan ahead for the chill time.
You’ll need to use full-fat block cream cheese, not spreadable cream cheese, to avoid a runny filling.
Who it’s best suited for
This version is perfect for anyone without oven access, such as dorm residents or renters with limited kitchen appliances. It’s also great for busy home cooks who want minimal active work, and for warm weather events when you don’t want to run the oven. If you prefer a lighter, less dense dessert, this method will suit your taste better.
It pairs nicely with crisp, low-effort veggie sides for a light summer meal, and makes a great sweet finish after a simple air fryer chicken main for a casual dinner.
Side-by-Side Comparison: Baked vs No-Bake Oreo Cheesecake
The right choice comes down to your specific needs, so we’ve broken down the core differences in the table below to make the decision simple.
| Feature | Baked Oreo Cheesecake | No-Bake Oreo Cheesecake |
|---|---|---|
| Active prep time | 30 minutes | 15 minutes |
| Total time to serve | 5 to 6 hours (including cooling and chilling) | 6 to 8 hours (chilling only) |
| Texture | Dense, fudgy, sliceable | Light, airy, mousse-like |
| Flavor profile | Rich, tangy, caramelized notes | Bright, fresh, subtle sweetness |
| Oven required | Yes, 325°F (160°C) | No |
| Storage life | Up to 5 days refrigerated | Up to 5 days refrigerated |
| Best for | Holiday potlucks, traditional cheesecake fans, oven access | Warm weather events, no oven, minimal active work |
Per USDA food safety guidelines, both versions must be stored at or below 40°F (4°C) at all times to avoid dairy spoilage. Per Kraft Heinz’s official Oreo product documentation, standard US Oreo cookies contain dairy and gluten, so shoppers with allergies should check labels carefully, and those following halal diets should seek certified halal Oreo variants sold at international grocers. For more tested, reliable dessert recipes, browse our full recipe collection.
If you need dairy-friendly dessert alternatives for sensitive eaters, our dairy-friendly dessert swaps offer great options for cream cheese substitutions. For warm, comforting drink pairings to serve with your cheesecake, check out our guide to perfect hot beverages.
Decision Guide: Which Oreo Cheesecake Method Should You Choose?
Pick no-bake if…
Go no-bake if you lack oven access, need under 20 minutes of active work, or prefer a light, airy mousse texture. This path works for dorm rooms, rental kitchens without full appliances, and hot summer days when you don’t want to heat your home. It’s also ideal if you can plan ahead for 6 to 8 hours of uninterrupted chilling time.
Pick baked if…
Go baked if you want a dense, fudgy crumb with deep, tangy cream cheese flavor, and have 30 minutes of active prep plus oven access. This version travels better to potlucks and holiday gatherings, and holds its shape cleanly when sliced for a crowd. It’s the better pick for traditionalists who love rich, caramelized dessert flavors that stand up to heavy toppings like hot fudge or salted caramel.
No-Bake Oreo Cheesecake Recipe
This recipe uses a 9-inch springform pan and standard pantry staples for consistent, sliceable results every time.
| Ingredient | Amount (9-inch pan) |
|---|---|
| Full-fat block cream cheese, softened | 1.5 lbs (24 oz) |
| Double Stuf Oreo sandwich cookies, divided | 30 cookies (18 for crust, 12 for filling) |
| Granulated sugar | 1/3 cup |
| Pure vanilla extract | 1 tsp |
| Unsalted butter, melted | 1/4 cup |
| Heavy whipping cream, cold | 1.5 cups |
Equipment you’ll need:
- 9-inch springform pan
- Food processor or heavy-duty zip-top bag + rolling pin
- Electric hand mixer
- 2 mixing bowls
- Rubber spatula
Step-by-step instructions:
- Line the springform pan base with parchment paper. Wrap the outside of the pan tightly with aluminum foil to prevent leaks if you need to move it while chilling.
- Crush 18 Oreos into fine crumbs using a food processor or sealed bag and rolling pin. Stir in melted butter until evenly combined. Press the mixture firmly into the pan base and 1 inch up the sides. Chill for 10 minutes to set.
- Beat softened cream cheese and sugar in a large bowl with an electric mixer on medium speed until completely smooth, about 2 minutes. Scrape down the bowl sides as needed to avoid lumps. Stir in vanilla extract.
- In a separate cold bowl, whip heavy cream to stiff peaks with the electric mixer. Fold the whipped cream gently into the cream cheese mixture until no white streaks remain.
- Crush the remaining 12 Oreos and fold them into the filling, plus extra for topping if desired. Pour the filling into the chilled crust, smooth the top, and cover the pan with plastic wrap.
- Refrigerate for at least 6 hours, preferably 8 hours, until the filling is completely firm to the touch. Running a thin knife around the pan edge before releasing the springform helps prevent the crust from sticking.
Per USDA dairy handling guidelines, always use pasteurized heavy cream and unexpired full-fat block cream cheese to reduce food safety risk. This no-bake version is perfect for quick dessert spreads alongside our easy air fryer vegetable side for a casual summer meal. If your filling turns out runny after chilling, it’s almost always from using spreadable cream cheese instead of full-fat block, or skipping the full chill time.
Baked Oreo Cheesecake Recipe
This method delivers a dense, fudgy crumb with a crisp, buttery crust that holds up to heavy toppings.
| Ingredient | Amount (9-inch pan) |
|---|---|
| Full-fat block cream cheese, softened | 1.5 lbs (24 oz) |
| Double Stuf Oreo sandwich cookies, divided | 30 cookies (18 for crust, 12 for filling) |
| Granulated sugar | 1/2 cup |
| Pure vanilla extract | 1 tsp |
| Unsalted butter, melted | 1/4 cup |
| Large eggs, room temperature | 2 |
| Sour cream | 1/2 cup |
| All-purpose flour | 1 tbsp |
| Cornstarch | 1 tsp (optional, for crack prevention) |
Equipment you’ll need:
- 9-inch springform pan
- Food processor or heavy-duty zip-top bag + rolling pin
- Electric hand mixer or stand mixer
- Large roasting pan (for water bath)
- Aluminum foil
- Instant-read thermometer (optional, for doneness check)
Step-by-step instructions:
- Preheat oven to 325°F (160°C). Wrap the outside of the springform pan tightly with 2 layers of aluminum foil to prevent water from seeping into the pan during the water bath.
- Make the crust by crushing 18 Oreos into fine crumbs, stirring in melted butter, and pressing the mixture firmly into the pan base and 1 inch up the sides. Chill for 10 minutes to set.
- Beat softened cream cheese and sugar in a large bowl on medium speed until completely smooth, about 2 minutes. Add sour cream, vanilla, and flour (plus cornstarch if using), mixing until just combined. Add eggs one at a time, mixing on low speed just until blended. Overmixing eggs adds air bubbles that cause cracks.
- Fold crushed remaining 12 Oreos into the filling gently. Pour filling into the crust, smooth the top, and tap the pan firmly on the counter 2 to 3 times to pop trapped air bubbles.
- Place the springform pan inside the large roasting pan, then pour boiling water into the roasting pan until it comes halfway up the side of the springform pan. This water bath regulates oven temperature to prevent overcooked edges and undercooked centers.
- Bake for 55 to 65 minutes, until the edges are set but the center still has a slight jiggle, like set yogurt. An instant-read thermometer will read 150°F (66°C) in the center when done.
- Turn off the oven, crack the door open 1 inch, and let the cheesecake rest in the oven for 1 full hour to cool gradually. This step prevents sudden temperature changes that cause cracks. Chill for at least 4 hours before slicing.
Per USDA egg safety guidelines, always use pasteurized eggs if serving pregnant people, young children, or immunocompromised individuals. This baked version pairs perfectly with savory mains like our easy meatball recipe for a casual dinner party spread. Aggregate home baking reviews show that skipping the gradual cooling step is the top cause of cracked baked cheesecake, even when all other steps are followed correctly.
Common Oreo Cheesecake Mistakes (and How to Fix Them)
Most cheesecake failures come down to small, avoidable errors. Here are the most common issues and their quick fixes:
- Cracked baked top: Caused by sudden temperature changes or overbaking. Fix by using a water bath, baking until the center still jiggles slightly, and cooling gradually in the turned-off oven with the door cracked.
- Runny no-bake filling: Caused by using spreadable cream cheese, under-whipped heavy cream, or skipping full chill time. Fix by using full-fat block cream cheese, whipping cream to stiff peaks, and chilling for a full 6 to 8 hours.
- Soggy crust: Caused by too much melted butter or excess moisture from the filling. Fix by using exactly 1/4 cup of melted butter for the crust, pressing the crust firmly, and chilling it for 10 minutes before adding filling.
- Oreos sinking to the bottom: Caused by heavy cookie pieces sinking before the filling sets. Fix by tossing crushed Oreos in 1 teaspoon of flour before folding, and adding them at the very end of mixing.
- Crumbly crust when slicing: Caused by under-pressing the crust or skipping the initial chill. Fix by pressing the crust mixture firmly into the pan, and chilling it for 10 minutes before adding the filling.
- Dry, curdled baked filling: Caused by overbaking or adding eggs at too high a speed. Fix by mixing on low speed when adding eggs, and pulling the cheesecake from the oven when the center still jiggles slightly.
Easy Oreo Cheesecake Variations and Swaps
You can customize this recipe to fit almost any taste or dietary need with simple swaps.
- Gluten-free: Swap regular Oreos for certified gluten-free Oreo variants, and use a gluten-free cookie crust or gluten-free graham cracker crust. As of 2026, most major US grocery stores carry gluten-free Oreo options.
- Reduced sugar: Swap up to half the granulated sugar for a 1:1 sugar substitute designed for baking. Use plain Oreos instead of Double Stuf if you want to cut sweetness further.
- Peanut butter cup: Fold 1 cup of chopped peanut butter cups into the filling before pouring, or top the set cheesecake with whole peanut butter cups and a drizzle of chocolate sauce.
- Chocolate overload: Use chocolate Oreos for the crust and filling, and top with melted dark chocolate and a sprinkle of flaky sea salt before serving.
- Mint: Use mint Oreos for the crust and filling, and add 1/4 teaspoon of peppermint extract to the no-bake filling for extra mint flavor.
- Dairy-free: Use full-fat dairy-free cream cheese, dairy-free butter, and coconut cream whipped to stiff peaks instead of heavy cream. Use certified dairy-free Oreo-style cookies if needed.
You don’t have to stick to a graham cracker base. Crushed regular Oreos mixed with melted butter make a perfectly chewy, chocolatey crust that pairs seamlessly with the filling. For a buttery, crisp alternative, use crushed chocolate sandwich cookies instead of graham crackers.
Top your custom cheesecake with our fig jam recipe for a sweet-tart contrast to the rich chocolate flavor. For halal dietary needs, use certified halal Oreo variants available at most international grocery stores, and verify all other ingredients meet halal certification standards.
Serving, Storage, and Reheating Tips
Run a sharp knife under hot water and wipe it dry between cuts for clean, neat slices. Top slices with extra crushed Oreos, whipped cream, or melted chocolate for extra flair.
Store covered cheesecake in an airtight container in the refrigerator for up to 5 days. For longer storage, wrap tightly in plastic wrap and aluminum foil, then freeze for up to 3 months.
Only baked cheesecake benefits from gentle reheating. Warm slices in the microwave for 10 to 15 seconds on 50% power, or warm the whole cheesecake in a 300°F (150°C) oven for 10 minutes. No-bake cheesecake should always be served cold, as heat will melt its light filling.
Frequently Asked Questions About Oreo Cheesecake
How long does Oreo cheesecake need to chill?
No-bake versions need 6 to 8 hours of refrigeration to set fully, while baked versions need at least 4 hours of chilling after cooling. Skipping full chill time leads to a runny filling that won’t hold its shape when sliced.
Can I use regular Oreos instead of Double Stuf?
Yes, regular Oreos work for both versions. Add an extra 1/4 cup of sugar to the filling if using regular Oreos, to match the sweetness of Double Stuf’s higher cream filling content.
Can I make Oreo cheesecake without a springform pan?
A standard 9-inch round cake pan works as a substitute, but you won’t get clean side releases. Line the pan with overhanging parchment paper to lift the cheesecake out once chilled.
How do I know when baked Oreo cheesecake is done?
Baked cheesecake is done when edges are set and the center has a slight jiggle, like set yogurt. An instant-read thermometer will read 150°F (66°C) in the thickest part of the filling at this point. Overbaking causes a dry, cracked top.
Can I freeze Oreo cheesecake?
Yes, both versions freeze well for up to 3 months. Wrap tightly in plastic wrap and aluminum foil to prevent freezer burn. Thaw frozen cheesecake in the refrigerator for 8 hours before serving.
Final Recommendation: Pick Your Perfect Oreo Cheesecake
Both baked and no-bake Oreo cheesecake are reliable, crowd-pleasing desserts using common pantry staples. Choose the no-bake version for low-effort, oven-free prep for warm weather or last-minute gatherings. Choose the baked version for a dense, rich traditional slice that holds up well for potlucks and holiday events.
Either way, you’ll end up with a dessert that disappears fast at any table. For more tested, beginner-friendly recipes, browse our full recipe collection.


