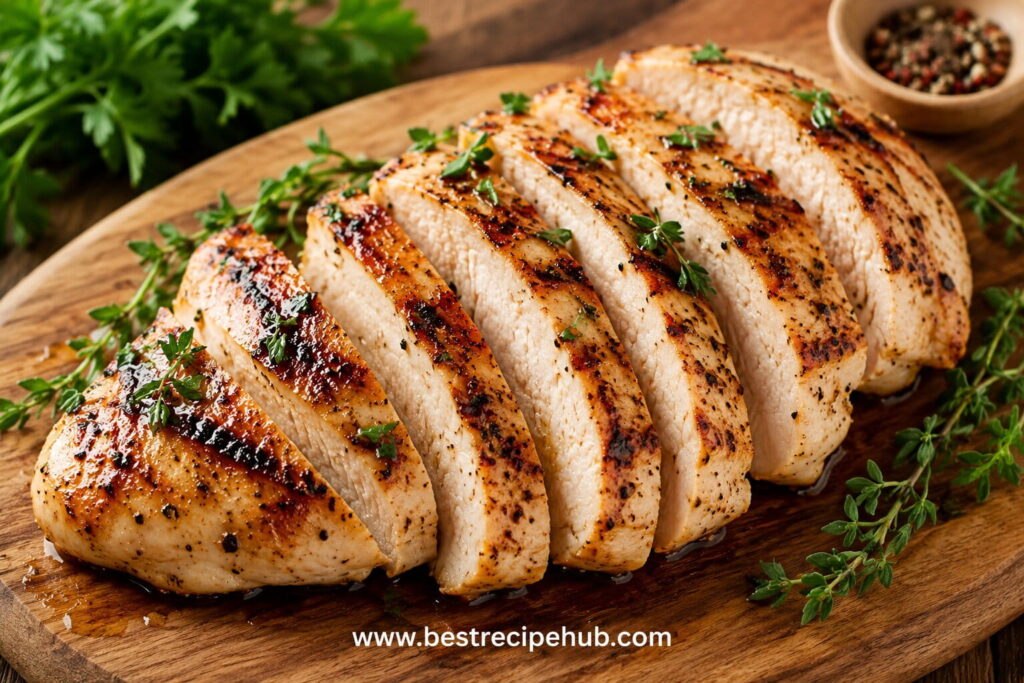
If you’ve ever cut into a perfectly golden chicken breast only to find it dry, stringy, or chalky, you’re not alone. This is the most common frustration home cooks face with lean poultry—and almost always, the problem is not the meat itself but how it’s handled. Chicken breast is naturally low in fat, which means it has very little margin for error. A few extra degrees of heat or a minute too long on the stove can turn a promising dinner into a disappointing one. But once you understand the science behind moisture loss, you can reliably produce juicy, tender chicken breast every single time.
This article covers the core techniques, the best recipes for every cooking method, and the practical habits that separate consistently great chicken from occasionally good chicken. By the end, you’ll have a complete toolkit—and a clear next step to apply it. You can also read our guide on healthy rotisserie chicken recipes.
Why Chicken Breast Dries Out (and How to Prevent It)
Chicken breast is almost pure lean muscle protein. As it heats, the protein strands contract and squeeze out moisture. The higher the temperature and the longer the cooking time, the more liquid is forced out. Once the internal temperature passes 165°F (the USDA safe minimum), that moisture loss accelerates sharply. Even if the outside looks fine, the inside can be dry.
Four factors make this worse:
- Uneven thickness – the thin tip cooks faster than the thick end, so by the time the center is safe, the edges are already overcooked.
- High, direct heat with no rest – juices pool toward the center during cooking; cutting immediately releases them.
- No brine or marinade – untreated meat has no built-in moisture buffer.
- Guessing doneness – visual cues like color or feel are unreliable; only a thermometer tells the truth.
The fix is straightforward and repeatable:
- Pound to even thickness (about ¾ inch) using a meat mallet or heavy pan. This solves the uneven-cooking problem before it starts.
- Brine or marinate for at least 20–30 minutes (see the brining section below).
- Cook to 160–162°F and let carryover heat bring it to 165°F while resting.
- Rest for 5 minutes before slicing. This allows muscle fibers to relax and reabsorb juices.
A simple saltwater brine (¼ cup salt dissolved in 4 cups water) for 20–30 minutes is one of the most effective techniques. It works by denaturing some surface proteins, allowing the meat to hold onto more moisture during cooking. Acidic marinades with citrus, buttermilk, or yogurt also help by gently tenderizing the fibers.
How to Choose the Best Chicken Breast at the Store
Great results start at the meat counter. Here’s what to look for:
- Plump, even shape – breasts that taper sharply on one end cook unevenly no matter how careful you are.
- Consistent pale pink color – grayish or dull spots indicate the meat is past its prime.
- Minimal liquid in the package – a large pool of pink liquid suggests the chicken has been frozen and thawed multiple times, which damages texture.
- Air-chilled over water-chilled – air-chilled chicken retains less water during processing, leading to better searing and more concentrated flavor. Many home cooks find it noticeably superior.
- Similar sizes when cooking multiple pieces – this ensures everything finishes at the same time.
Organic or air-chilled breasts cost more, but for a staple you eat several times a week, the improvement in texture and flavor often justifies the extra expense. If budget is a concern, buying larger packs of standard breasts and pounding them to uniform thickness works nearly as well.
Essential Tools for Consistent Results
You don’t need a professional kitchen, but a few key pieces of equipment remove almost all guesswork:
| Tool | Why it matters |
|---|---|
| Instant-read meat thermometer | The single most important tool. Takes the guesswork out of doneness. |
| Meat mallet or rolling pin | For pounding to even thickness before cooking. |
| Heavy-bottomed skillet (cast iron or stainless steel) | Retains heat well and produces a better sear than thin nonstick pans. |
| Wire rack for baking | Elevates chicken so hot air circulates underneath, promoting even cooking and crispier coatings. |
| Sharp chef’s knife | A dull knife tears the meat and releases extra juices; a clean slice preserves moisture. |
None of these are expensive, but together they deliver chicken that is consistently tender and juicy—not just occasionally.
The Science of Brining and Marinating
Brining and marinating are two different approaches, each with its own benefits.
Wet brining involves submerging chicken in a saltwater solution (typically ¼ cup salt per 4 cups water) for 20–30 minutes. The salt alters the protein structure so the meat retains more moisture during cooking. You can also add sugar, herbs, or spices to the brine for extra flavor. Avoid brining for more than 2 hours, or the meat can become mushy.
Dry brining (salting the surface and letting it rest uncovered in the refrigerator for 1–24 hours) achieves a similar effect while also drying the skin or surface, which helps produce a better crust. For chicken breast, a dry brine of 30 minutes to 1 hour is sufficient.
Marinating uses an acidic ingredient (citrus juice, vinegar, yogurt, buttermilk) along with oil and seasonings. The acid gently tenderizes the outer layers of the meat, while the oil helps carry fat-soluble flavors. Marinate for at least 30 minutes and up to 8 hours—longer than that can make the texture mushy, especially with citrus.
A practical rule: if you want maximum moisture retention, wet brine for 30 minutes. If you want a deeper flavor infusion, use an acidic marinade. Both are far better than cooking untreated chicken.
Best Juicy Chicken Breast Recipes by Method
Below are tested recipes across the most popular cooking methods. Each one is built around the core principles of even thickness, proper temperature, and resting.
Skillet Recipes
Pan-searing is the fastest way to get a golden, flavorful crust while keeping the inside juicy—as long as you manage the heat correctly.
Garlic Butter Chicken Breast
- Pound chicken breasts to an even ¾-inch thickness. Season generously with salt, black pepper, and paprika.
- Heat 1 tablespoon olive oil in a cast iron skillet over medium-high heat. Sear the chicken for 5–6 minutes per side, until deep golden brown.
- Reduce heat to medium-low. Add 2 tablespoons butter, 3 minced garlic cloves, and a few sprigs of fresh thyme.
- Spoon the melted garlic butter over the chicken for the last minute of cooking.
- Remove from the pan and rest for 5 minutes before slicing. Spoon pan juices over the top.
Why it works: The butter basting adds richness and keeps the surface moist, while the initial sear locks in flavor. The entire process takes under 20 minutes.
 Golden-brown chicken breast being basted with garlic butter in a cast iron skillet.
Creamy Tuscan Chicken Breast
- Sear seasoned chicken breasts in olive oil until golden, then set aside.
- In the same pan, sauté 3 minced garlic cloves, ¼ cup sun-dried tomatoes, and 2 cups fresh baby spinach until wilted.
- Add ½ cup heavy cream, ¼ cup chicken broth, and ¼ cup grated Parmesan cheese. Stir until the sauce thickens slightly.
- Return the chicken to the skillet, spoon the sauce over the top, and cook for 2–3 minutes more until the chicken reaches 165°F.
- Rest briefly, then serve with the sauce.
The sauce acts as a moisture barrier, keeping the chicken tender while it finishes cooking. This is a one-pan meal that feels special enough for guests but is simple enough for a weeknight.
Oven-Baked Recipes
Baking is the most forgiving method for beginners, especially when you use a thermometer.
Honey Mustard Baked Chicken Breast
- Whisk together 3 tablespoons honey, 2 tablespoons Dijon mustard, 1 tablespoon olive oil, and 1 tablespoon apple cider vinegar.
- Coat chicken breasts and marinate for at least 30 minutes (or up to 4 hours).
- Place on a wire rack set over a baking sheet. Bake at 400°F for 20–25 minutes, depending on thickness, until internal temp reaches 160°F.
- Let rest for 5 minutes. Drizzle with the pan juices before serving.
The rack allows hot air to circulate, preventing the bottom from steaming. The honey-mustard glaze caramelizes without burning, and the vinegar helps tenderize the meat.
Parmesan-Crusted Chicken Breast
- Dip chicken in beaten egg, then coat with a mixture of ½ cup panko breadcrumbs, ¼ cup grated Parmesan, 1 teaspoon Italian seasoning, and a pinch of salt.
- Bake at 425°F for 18–22 minutes on a wire rack for maximum crispiness.
- The Parmesan crust locks in moisture while creating a crunchy exterior that doesn’t require frying.
Sheet Pan Chicken and Vegetables
- Toss chicken breasts and chopped vegetables (bell peppers, zucchini, red onion) with 2 tablespoons olive oil, 1 teaspoon garlic powder, and 1 teaspoon dried Italian herbs.
- Arrange in a single layer on a sheet pan. Roast at 400°F for 20–25 minutes, flipping the chicken halfway.
- The vegetables release moisture as they cook, which helps keep the chicken from drying out. One pan, minimal dishes, and a full dinner in under 30 minutes.
Grilled Recipes
Grilling adds smoky depth, but it’s also one of the easiest ways to overcook chicken if the grill runs too hot.
Classic Grilled Lemon Herb Chicken
- Marinate chicken in ¼ cup olive oil, juice of 1 lemon, 3 minced garlic cloves, 1 teaspoon dried oregano, and 1 teaspoon dried rosemary for at least 1 hour (up to overnight).
- Preheat grill to medium-high heat (about 400°F). Grill 6–7 minutes per side, flipping only once.
- Use a thermometer—grill temperatures vary widely. Pull at 160°F.
BBQ Grilled Chicken Breast
- Grill plain seasoned chicken over medium-high heat until nearly done (about 5 minutes per side).
- Brush with barbecue sauce during the last 2–3 minutes only.
- Adding sauce too early causes burning before the chicken finishes cooking. The brief glaze gives you sweet, smoky flavor without charred bitterness.
Slow Cooker & Instant Pot Recipes
For hands-off cooking, low-and-slow methods practically guarantee tenderness.
Slow Cooker Salsa Chicken
- Place 4 chicken breasts in the slow cooker with 1 jar (16 oz) salsa, 1 packet taco seasoning, and ¼ cup chicken broth.
- Cook on low for 4–5 hours (or high for 2–3 hours).
- Shred with two forks and use in tacos, burrito bowls, or salads. The salsa keeps the meat moist throughout the long cook.
Instant Pot Shredded Chicken
- Add 4 chicken breasts, 1 cup chicken broth, and your choice of seasonings to the Instant Pot.
- Cook on high pressure for 10–12 minutes, then natural release for 5 minutes.
- The pressure-cooking environment keeps the meat moist even with minimal attention. This is nearly foolproof for meal prep.
One-Pan Chicken Breast Dinners
When time and energy are both short, one-pan recipes deliver a complete meal with almost no cleanup.
Chicken and Rice Skillet
- Sear seasoned chicken breast in olive oil, then remove from the pan.
- In the same skillet, sauté ½ diced onion and 2 minced garlic cloves. Add 1 cup long-grain rice, 1½ cups chicken broth, and a pinch of paprika.
- Nestle the chicken back on top, cover, and simmer for 15–18 minutes until the rice is tender and the chicken reaches 165°F.
- The chicken’s juices flavor the rice as everything cooks together.
Chicken Fajita Skillet
- Slice chicken breast into strips and toss with 1 teaspoon chili powder, 1 teaspoon cumin, and juice of ½ lime.
- Sear the strips in a hot skillet with oil until cooked through, about 4–5 minutes.
- Add sliced bell peppers and onion to the same pan. Cook until the vegetables are tender-crisp.
- Serve in warm tortillas with your favorite toppings—sour cream, guacamole, salsa.
 Colorful one-pan fajita skillet with sliced chicken, bell peppers, and onions, ready to serve with tortillas.
Meal Prep Tips for Chicken Breast
Cooking chicken breast in bulk for the week requires a few extra precautions to keep it from drying out in the fridge.
- Undercook slightly – pull chicken at 160°F, since reheating will finish the cooking process.
- Store with a bit of sauce or broth – a few tablespoons of liquid in the container prevents moisture loss during refrigeration.
- Slice before storing – smaller pieces reheat faster and more evenly than whole breasts.
- Reheat gently – a covered skillet over low heat with a splash of broth works far better than the microwave, which tends to toughen the exterior. If you must use a microwave, use 50% power and heat in short bursts.
A simple lemon garlic chicken breast recipe, made in bulk and portioned into containers with rice and roasted vegetables, is one of the most reliable meal-prep formulas. For variety, you can also incorporate a batch of ground chicken alternatives into your weekly rotation.
How to Reheat Chicken Breast Without Drying It Out
Leftover chicken breast has a reputation for turning rubbery, but small adjustments make a big difference:
- Add moisture – a splash of broth, water, or sauce in the container creates steam that keeps the meat from drying out.
- Use lower power – in the microwave, 50% power for longer intervals is gentler than full power.
- Reheat in a covered skillet – low heat with a lid traps steam and produces noticeably better texture than the microwave.
- Slice before reheating – smaller pieces heat more evenly and quickly.
- Avoid reheating more than once – each cycle pushes moisture out of the meat.
These tips matter most for anyone who meal preps chicken breast in bulk, because reheated chicken is often judged more harshly than freshly cooked chicken.
Common Mistakes That Ruin Chicken Breast
Even experienced cooks fall into these predictable traps. Avoiding them doesn’t require special skill—just awareness and a thermometer.
- Cooking straight from the fridge – cold chicken hitting a hot pan cooks unevenly. Let it sit at room temperature for 15–20 minutes first.
- Overcrowding the pan – too many pieces at once lowers the pan’s temperature and causes steaming instead of searing. Cook in batches if needed.
- Flipping too often – constant flipping prevents a proper crust from forming. Flip once, or at most twice.
- Skipping the thermometer – this is the single biggest predictor of dry chicken. A $10 instant-read thermometer is the best investment you can make.
- Cutting immediately after cooking – always rest for 5 minutes before slicing.
- Using the wrong pan size – a pan that’s too small causes crowding and steaming; one that’s too large can lead to burnt spots where there’s no food to absorb the heat.
Trusting a thermometer over guesswork transforms your results. The USDA recommends a safe internal temperature of 165°F for chicken, but pulling at 160–162°F and letting carryover cooking finish the job gives you the safest, juiciest outcome.
Frequently Asked Questions
What is the best way to keep chicken breast juicy?
Pound it to even thickness, brine or marinate before cooking, cook to 165°F (pulling at 160–162°F), and rest for 5 minutes. These four steps address the main causes of dryness.
How long should you cook chicken breast so it doesn’t dry out?
Cooking time depends on thickness and method. As a general guide, a ¾-inch breast takes about 5–6 minutes per side in a skillet, 20–25 minutes baked at 400°F, or 6–7 minutes per side on a grill. Always confirm doneness with a meat thermometer.
What temperature should chicken breast be cooked to?
165°F is the safe minimum. Pulling it at 160–162°F and letting it rest allows carryover cooking to finish the job without overcooking the meat.
Should you cover chicken breast while baking?
Covering with foil for part of the baking time helps trap steam and retain moisture, especially for thicker cuts. Uncover for the last few minutes to allow the top to brown.
Why is my chicken breast tough and rubbery instead of dry?
Rubbery chicken is usually a sign of cooking over heat that’s too high or too fast, causing the proteins to seize up quickly. Lower the heat slightly and cook more gradually.
Is it better to bake or pan-sear chicken breast?
Both work well. Pan-searing gives a better crust and is faster; baking is more forgiving and hands-off. For the best of both, sear the chicken first, then finish it in the oven.
How do you make chicken breast taste better without added fat?
Marinades with acid (citrus, vinegar) and aromatics (garlic, herbs, spices) add significant flavor without relying on extra fat. Dry rubs with bold spice blends also work well. For a change of pace, try Moroccan-inspired spice blends or Asian chicken preparations to keep meals interesting.
Can you freeze cooked chicken breast without it becoming dry?
Yes, as long as it’s stored properly. Slice or shred the chicken, store it with a bit of broth or sauce to prevent moisture loss, and freeze in an airtight container for up to 3 months. Thaw in the refrigerator overnight before reheating gently.
Conclusion
Juicy chicken breast is not a mystery—it’s a matter of technique. Pound it evenly, brine or marinate it, cook it to the right temperature with a reliable thermometer, and always let it rest. These four habits, applied across any cooking method, will consistently deliver tender, moist results.
The best way to start is to pick one method from this article—the garlic butter skillet recipe, for example—and practice it until it becomes second nature. Once you master the fundamentals, you can experiment with different flavor profiles, like fresh avocado sides or quick cherry tomato dishes, to keep your meals varied and exciting.
Start with the garlic butter chicken breast recipe tonight. It’s a reliable, foolproof method that delivers every time, and it will give you the confidence to tackle any chicken breast recipe from here on out.


